

 Tweet
Tweet
this how-to is for those that wish to be able to have the fogs, lows and highs on all at the same time when using the brights
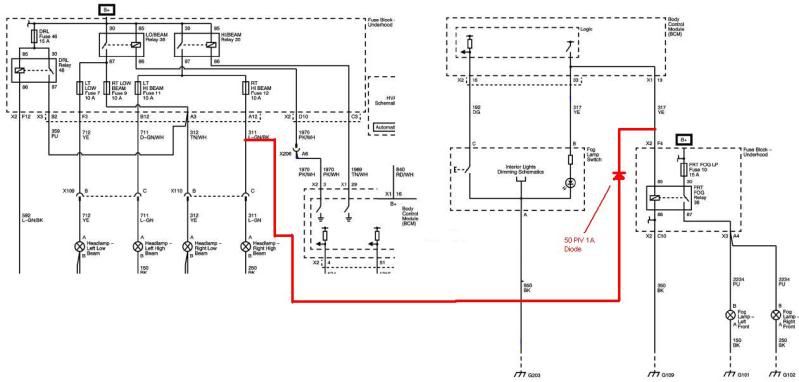
Firstoff here is the wireing diagram with the circuit to keep the fogs on with the highs in red....
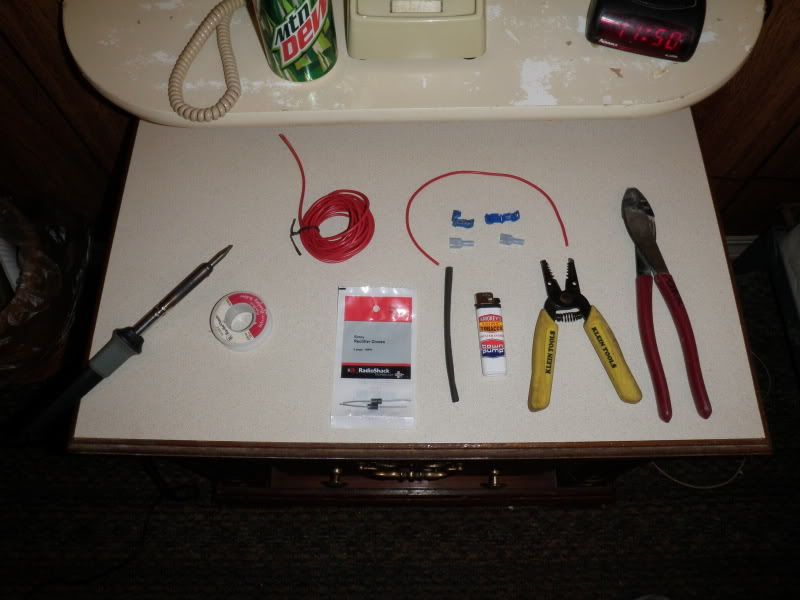
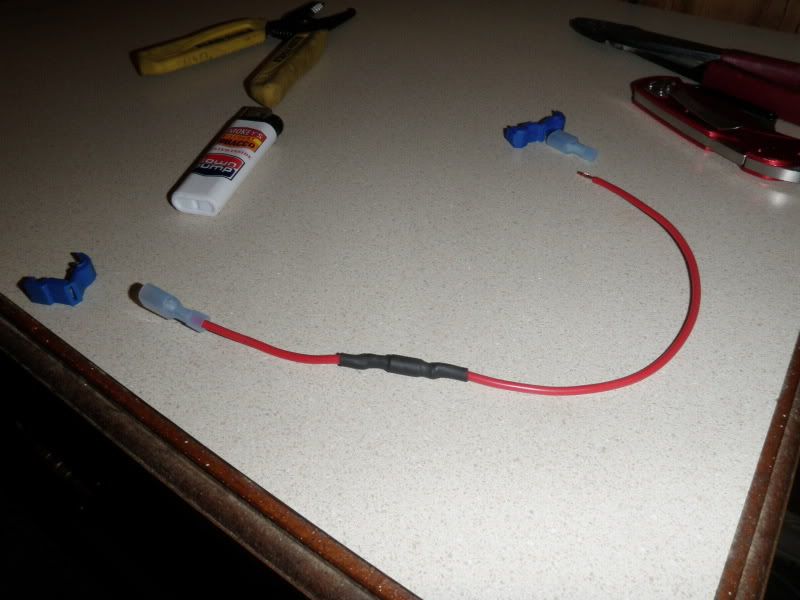
the items needed are a soldering iron, solder, heat shrink, wire strippers, crimp tool, a lighter or heat gun, 12-15" of 18ga wire, one 50 PIV 3A diode, and 2 male quick connect terminals with quick connect wire taps (you can find these at oreilys and such)
first cut a 12-15" piece of 18ga wire and cut it in two about 4" from one side, and strip the endsabout 1/4" on the quick connect ends and 1/2" on the ends that will be soldered to the diode..... you can go ahead and crimp ONE of the male quick connect terminals on at this time
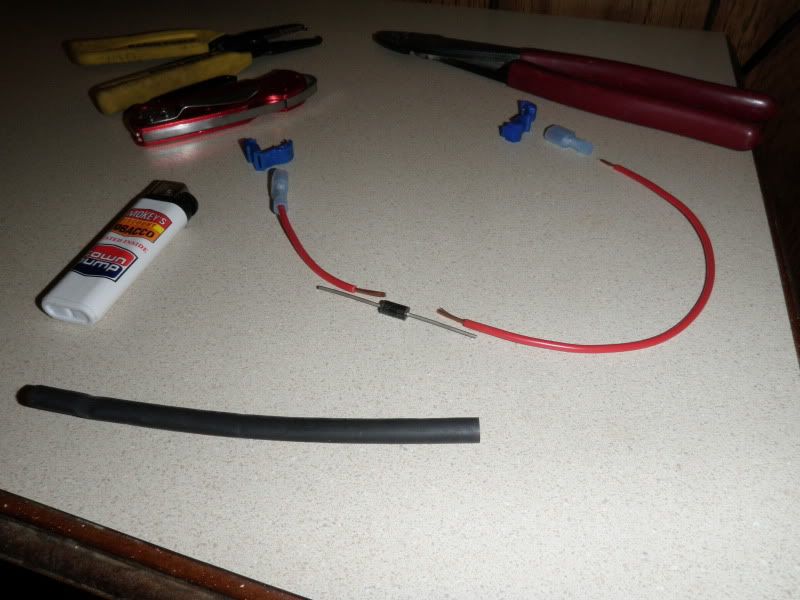
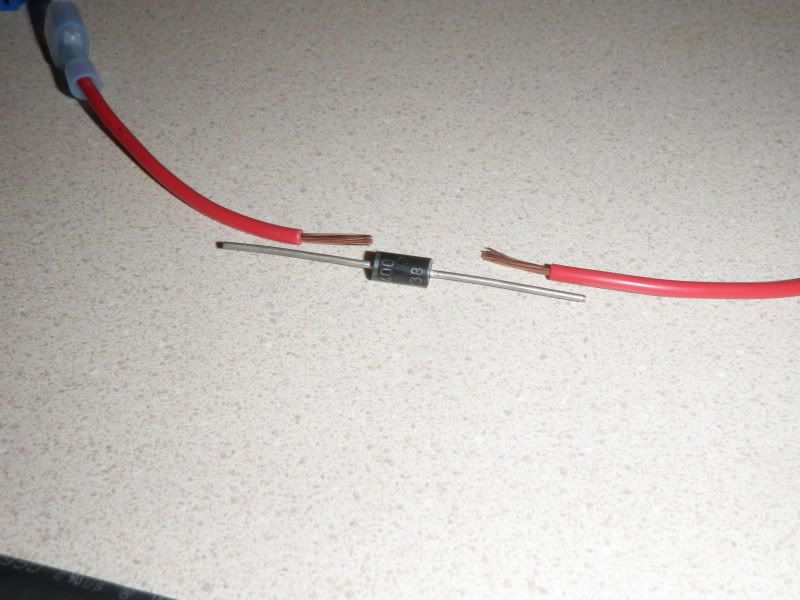
attention must be paid to the orientation of the diode, the end with the band must go towards the fog light relay wire, i soldered the short wire to the side with the band
next cut pieces of heat shrink large enough to cover ther diode and i also cut pieces to heatshrink over the end of the connectors......be sure to slide the heat shrink on before crimping the 2nd connector
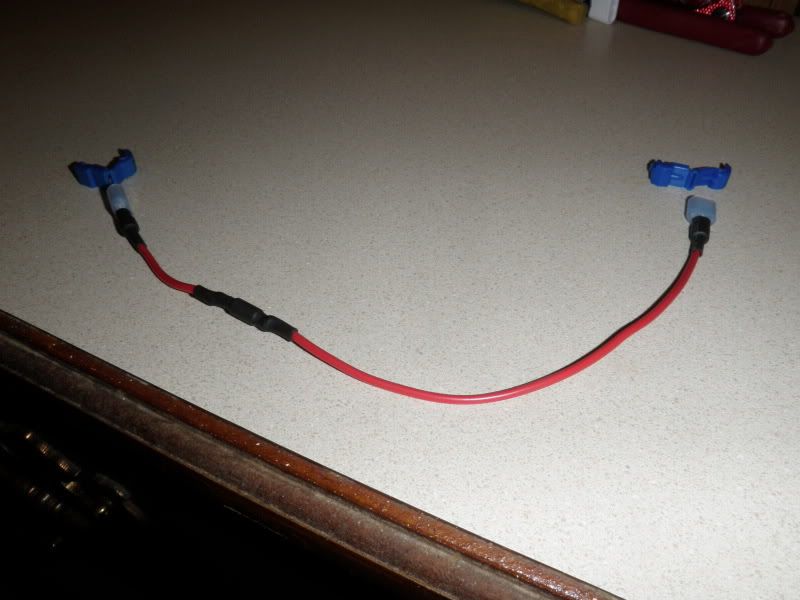
the finished jumper wire with diode should look like this
next, go out to your car and remove the battery and fuse box covers, there are 4 tabs on the fuse box you will need to pry up with a small flathead screw driver, pull up slightly on the fuse box to keep them from re-engageing while you get them all free, pull the fuse block up from the mount, and lossen the 3 7mm bolts closest to the fire wall, then you can pull the blocks out from the fuse box, the 2nd block from the front goes to the headlights and is darker gray in color you need to place one of the wire tap quick connects on the wire coming from pin A12 or B12 these are both wires to the high beams, the wire color should be dark green/wht or light green/brown mine are different b/c i redid my harness in 14ga wire directly to my HID balasts rather than the stock headligh conectors, the LONG wire side need to be connected here, never mind all the cstom wireing lol, part of it is for my fogs that are now my DRLs
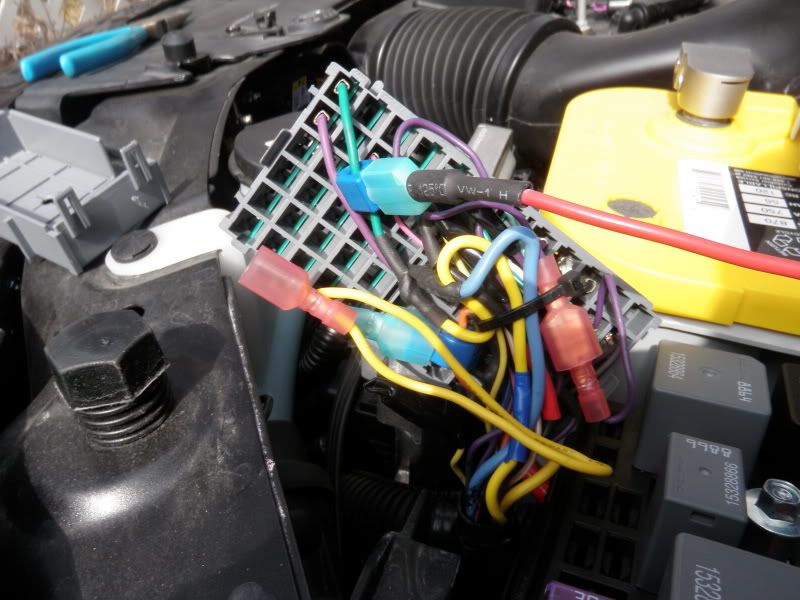
the short wire which is the banded end of the diode need to connect to the fog light relay coil wire which is pin F4 yellow wire in the wireing block 3rd from the front of the car i think it was light gray or tan, i also had to remove the small black block as well to gain access to the 3rd block
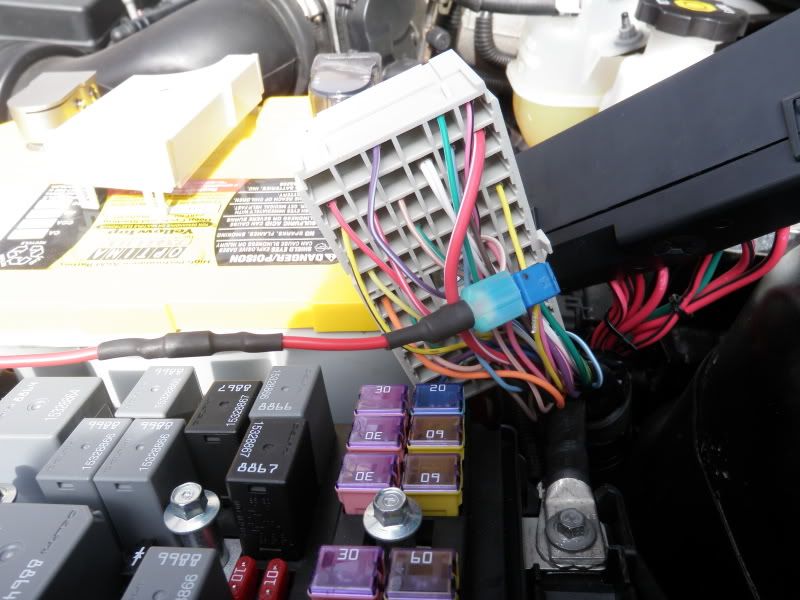
and this is the final result
when you have your lows on and turn on the brights the fogs lows and bright will be lit, when you have the lows and fogs on and turn on the brights the fogs stay one--------for those that wish to sometimes NOT have the fogs on with the brights you would have to install a switch in series with the wire with the diode in it and when the switch was off, the fogs would go back to normal operation

Firstoff here is the wireing diagram with the circuit to keep the fogs on with the highs in red....
the items needed are a soldering iron, solder, heat shrink, wire strippers, crimp tool, a lighter or heat gun, 12-15" of 18ga wire, one 50 PIV 3A diode, and 2 male quick connect terminals with quick connect wire taps (you can find these at oreilys and such)
first cut a 12-15" piece of 18ga wire and cut it in two about 4" from one side, and strip the endsabout 1/4" on the quick connect ends and 1/2" on the ends that will be soldered to the diode..... you can go ahead and crimp ONE of the male quick connect terminals on at this time
attention must be paid to the orientation of the diode, the end with the band must go towards the fog light relay wire, i soldered the short wire to the side with the band
next cut pieces of heat shrink large enough to cover ther diode and i also cut pieces to heatshrink over the end of the connectors......be sure to slide the heat shrink on before crimping the 2nd connector
the finished jumper wire with diode should look like this
next, go out to your car and remove the battery and fuse box covers, there are 4 tabs on the fuse box you will need to pry up with a small flathead screw driver, pull up slightly on the fuse box to keep them from re-engageing while you get them all free, pull the fuse block up from the mount, and lossen the 3 7mm bolts closest to the fire wall, then you can pull the blocks out from the fuse box, the 2nd block from the front goes to the headlights and is darker gray in color you need to place one of the wire tap quick connects on the wire coming from pin A12 or B12 these are both wires to the high beams, the wire color should be dark green/wht or light green/brown mine are different b/c i redid my harness in 14ga wire directly to my HID balasts rather than the stock headligh conectors, the LONG wire side need to be connected here, never mind all the cstom wireing lol, part of it is for my fogs that are now my DRLs
the short wire which is the banded end of the diode need to connect to the fog light relay coil wire which is pin F4 yellow wire in the wireing block 3rd from the front of the car i think it was light gray or tan, i also had to remove the small black block as well to gain access to the 3rd block
and this is the final result
when you have your lows on and turn on the brights the fogs lows and bright will be lit, when you have the lows and fogs on and turn on the brights the fogs stay one--------for those that wish to sometimes NOT have the fogs on with the brights you would have to install a switch in series with the wire with the diode in it and when the switch was off, the fogs would go back to normal operation


Comment