If this is your first visit, be sure to
check out the FAQ by clicking the
link above. You may have to register
before you can post: click the register link above to proceed. To start viewing messages,
select the forum that you want to visit from the selection below.
I was bummed out for sure because the GM kit looks great on our cars but that's $450.00 I can throw at the 6 some where else. I did a small performance mod but I'm not entirely pleased with the way it is rattling so stay tuned pics are coming.
Current Mods
245/45/17 Bridgestone Potenza RE-01 R, 245/45/17 Bridgestone Blizzak WS60, Eibach springs, Debadged, Recessed upper grills, GTP rear valance, GXP exhaust, Redline Tuning QuickLifts, K&N air filter, GMPP strut tower brace, Steering wheel stereo controls, Baer Cobalt 13" front brakes, Cobalt SS 11.75" rear brakes, Stainless steel braided brake lines front & rear, Leather steering wheel, Recessed lower grills, Leather shifter handle, Leather parking brake handle, Leather console lid cover, Volant intake, PIAA H9 & H11 Xtreme White Plus headlights & driving lights, 93 octane tuned ECM & TCM, Custom painted headlights, Motorsport Tech wheel adapters, C5 Corvette 17" x 8.5" wheels, Koni Sport struts and shocks, MSD 8.5mm Super Conductor plug wires, Racingline polyurethane motor mount inserts... Altered6 Progression Page
I was bummed out for sure because the GM kit looks great on our cars but that's $450.00 I can throw at the 6 some where else. I did a small performance mod but I'm not entirely pleased with the way it is rattling so stay tuned pics are coming.
What was the modd??? Your killing me here...
2012 AWD Fusion Sport...
Steeda springs, Steeda STB, Steeda Motor mount, Steeda Intake, Steeda 93/100 octain tune, Steeda TB spacer, Magnaflow catback, 19x8.5 mustang GT wheels painted body color, 5% and 35% TINT, upper and lower 6,000k HID's, Steeda Hood struts, and tinted tails, and much more...http://www.cardomain.com/ride/3974935/2012-ford-fusion/
Traded G6 - http://www.g6performance.com/forum/s...ad.php?t=17590
2006 G6 V6, 12" vinyl strip along windshield, 5% tint on all around, painted mirrors, Eibach Pro-Kit, CRABS Option 3, Dr. Speed FPU, 8k Highs/Lows with halogen fogs, tinted tails, custom Flowmaster 44 exhaust with resonator delete, and a Kenwood headunit along with a metra kit.
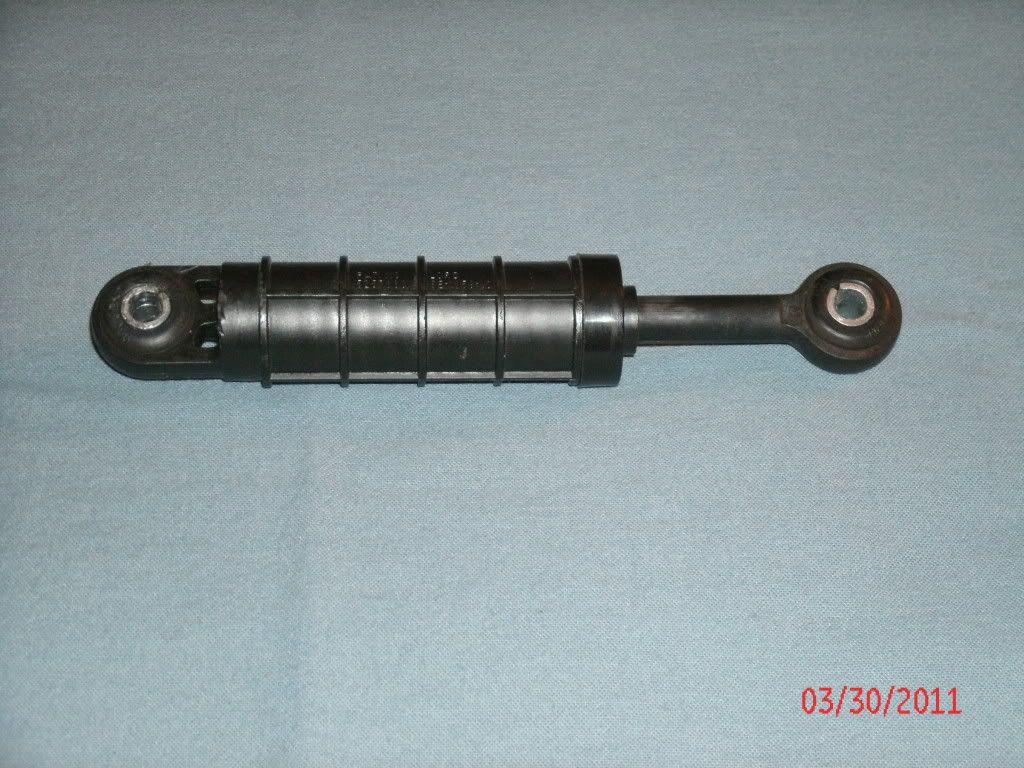
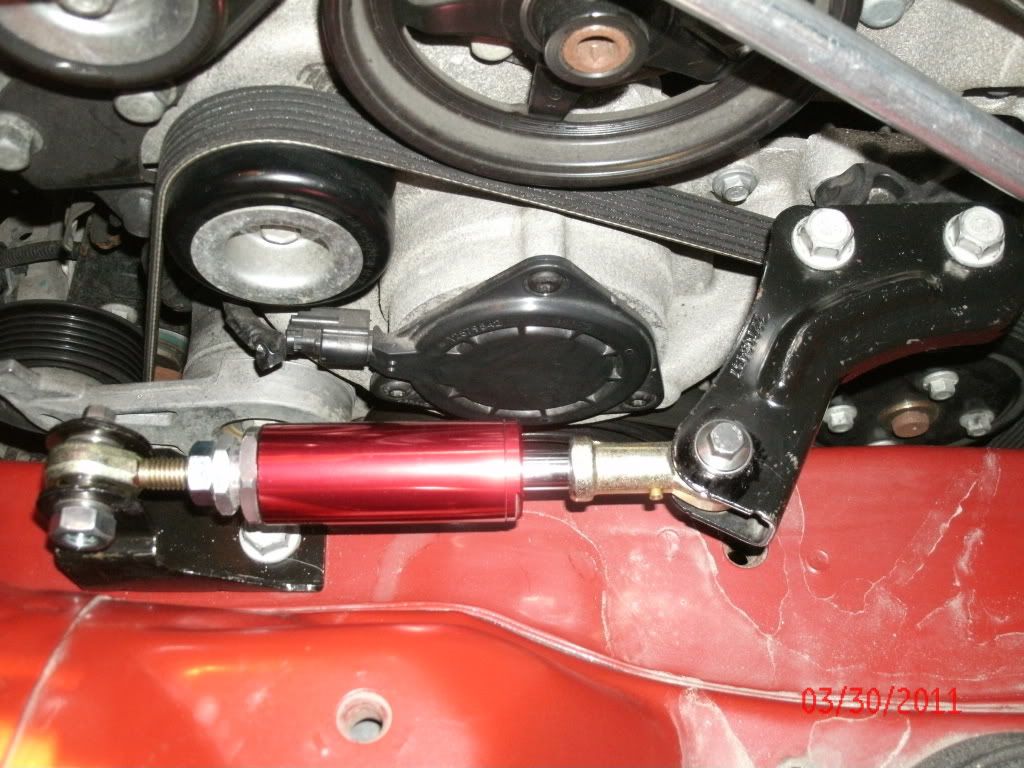
Well the report on this NRG Engine Damper mod is looooooooooooong over due as I did it back in the early Spring and wasn't entirely happy with the end result. I originally stole the idea from another member here, LB2 who has one previously installed in his Malibu. The procedure is fairly simple and easy to do and made even quicker if you have an after market CAI, as you won't have to move it out of the way and/or a drill press. I had neither. It can be accomplished using basic Metric hand tools including a drill.
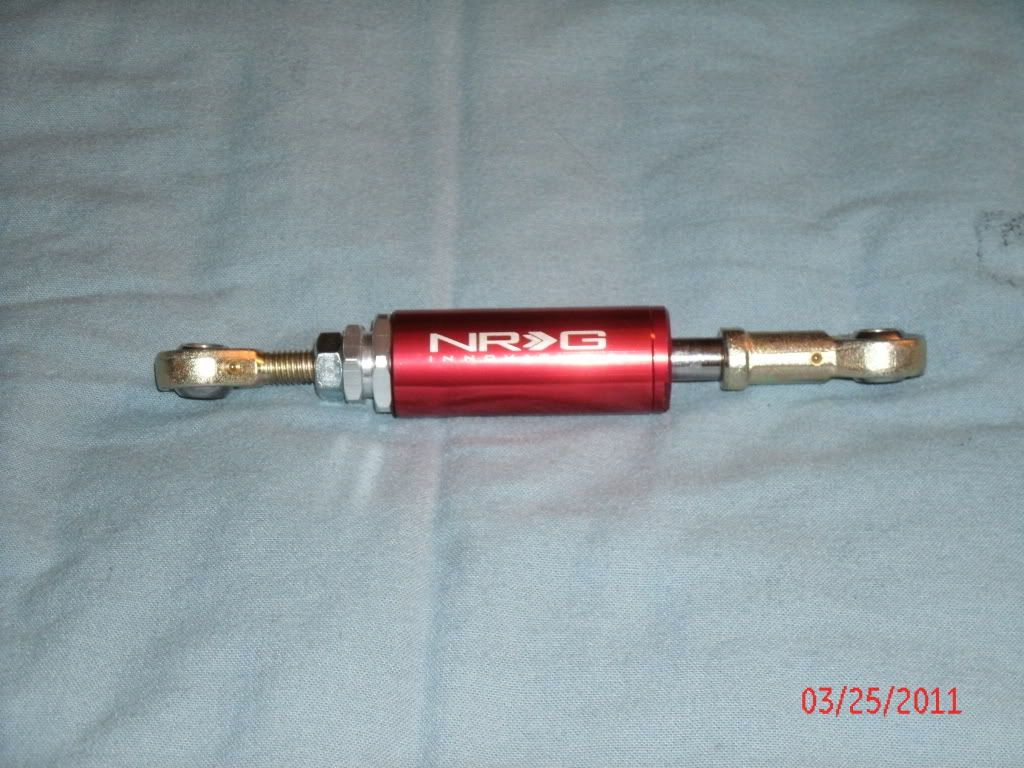
I ordered mine from a vender on Ebay. There are a variety of colors, bracket designs and lengths available but the one I picked was the cheapest one I could find that, as it turned out, was for a Honda Civic. I did find a no-name brand Damper for about $16 that looked like it was worth $5 so I passed on it.
What you will receive for your $90-$100+ is a very high quality, nicely anodized piece with a lot of adjustability options. A word of advice is to take the damper completely apart and tighten every thing. All parts with mine were only finger tight.
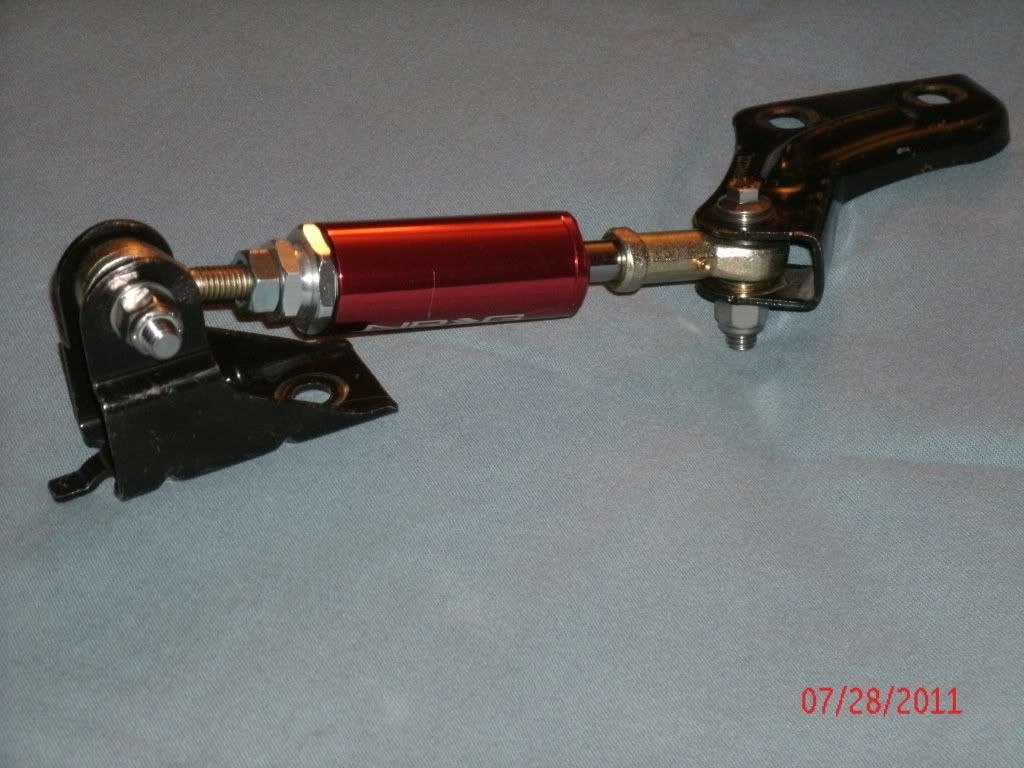
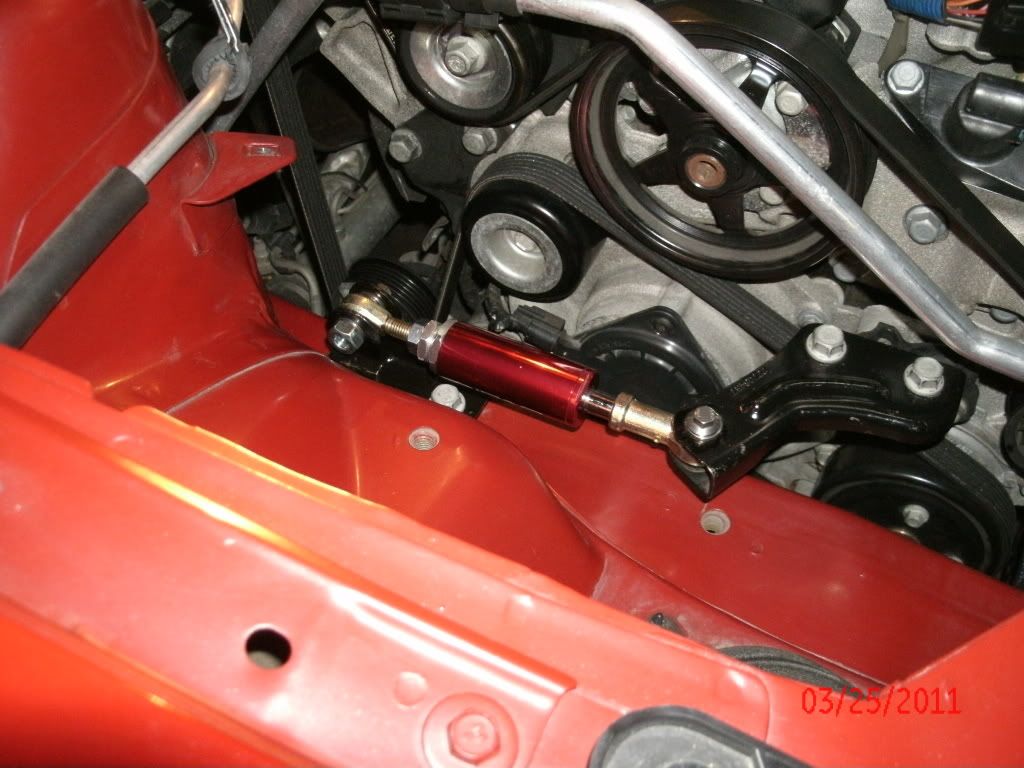
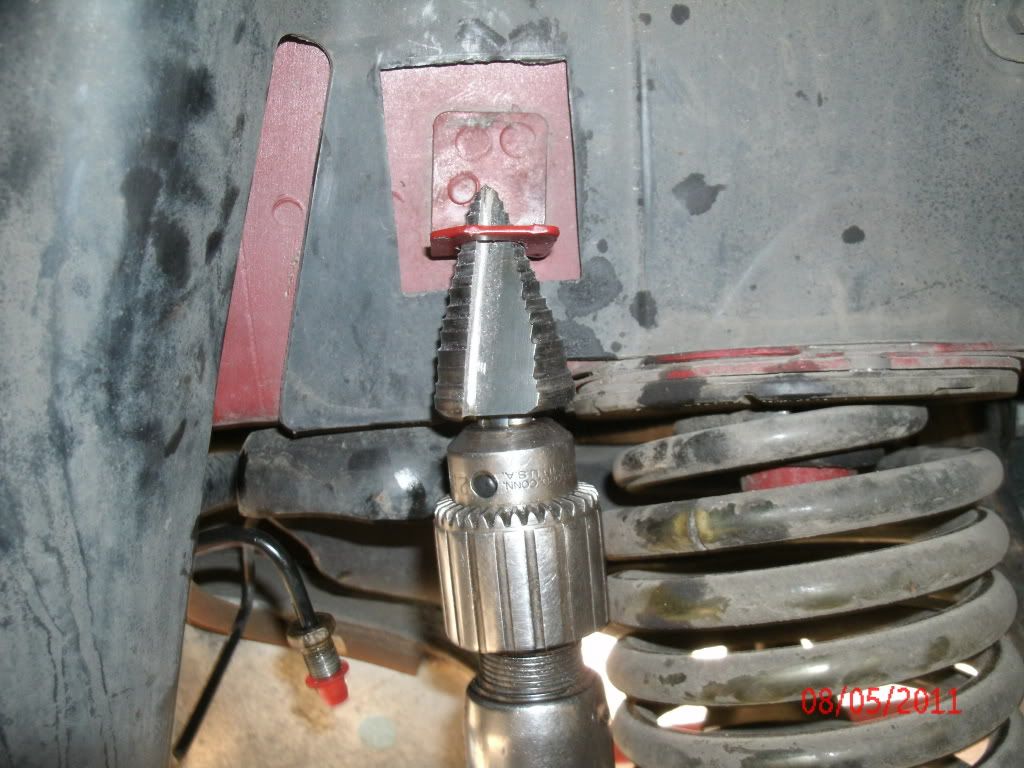
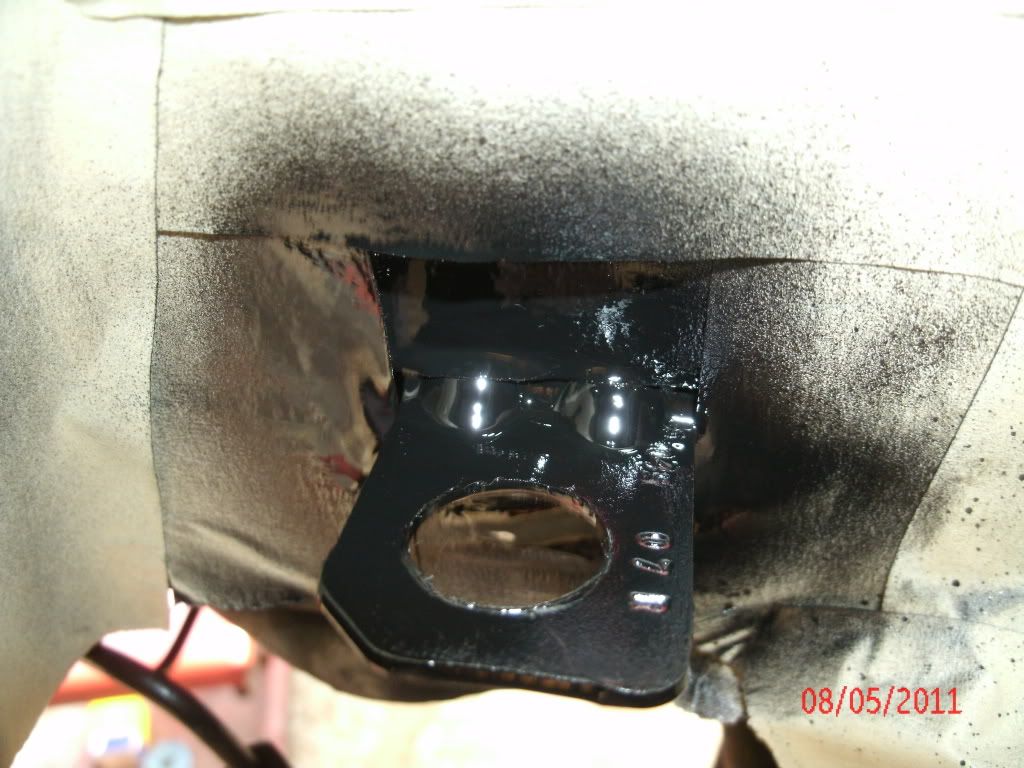
If you still have an OEM air filter box remove the two hex head screws at each upper corner and one bottom center and wiggle the box up and out of the way. Next remove two bolts that secure the damper bracket to the engine. One more bolt holds the damper to the chassis and it's out. The OEM damper and brackets are one unit held together with aluminum rivets. Drill them out. It's not necessary to be eagle eye accurate during this step as the holes in the bracket will need to be enlarged. Drill a larger hole, to accommodate the appropriate sized bolts, in each OEM bracket where the NRG damper attaches. The bolts included with the kit are too short to be used with the OEM brackets. I used 1.75 inch long bolts and nylock nuts to attach the NRG damper to the OEM brackets. I also used a washer on each side of the rod ends inside the brackets(to reduce the possibility of unwanted movement and rattling) as well as outside the brackets for a total of four washers per each end. Tighten the sh1t out of the nuts and bolts and put every thing back where it was.
What I like about this mod is the relationship between throttle input and power output instantly became very closely related as the engine no longer rocks back and forth with the all too compliant OEM damper. Simply put the throttle response greatly improved. Torque steer is also greatly diminished. What I didn't like about it is that it rattled at idle and upon start up and shut down. I was able to fix the rattle at idle by loosening the jamb nut on the male rod end and turned the damper body until it was good and tight but the rattle at start up and shut down remained. To clarify the severity of the rattle it is loud enough to make people walking in a parking lot turn around and give you a look of Oh, you should have bought an import. Uhm, BS!!! It was discussed in another thread that the damper combined with the Motor Mount Inserts would/could be a good combination but as I don't currently have them I'm unsure if this would solve the out standing rattle. I suspect that the rod ends that the damper comes with are cheapies as they are way looser than any pieces I have seen before. I replaced the NRG damper with a new OEM unit from NewChevroletParts.com. Eventually I will revisit this mod and try to find better quality rod ends and see what happens. Stay tuned.
Cold air intake, racingline engine mounts, painted engine cover, tinted tail lights, resonator delete, red and black calipers, Flowmaster 50 series, black upper recessed grills,cobalt ss/tc rims, massive audio nano 800w amp, pioneer A series 460W speakers, pioneer double din touch screen headunit and debadge[color=#FF0000][
Cold air intake, racingline engine mounts, painted engine cover, tinted tail lights, resonator delete, red and black calipers, Flowmaster 50 series, black upper recessed grills,cobalt ss/tc rims, massive audio nano 800w amp, pioneer A series 460W speakers, pioneer double din touch screen headunit and debadge[color=#FF0000][
MODS:20% tint, Lumens 6000K HIDs low and fogs, Lumens white LED plate light and reverse lights, Spyder LED/CCFL Halo/Projector headlights, white/white "Switchback" LED rear tail/brake/signals, shorty antenna, debadged hatch and front doors, blacked out grill
Awesome thread! Great detail. Ive looked at the damper when the Malibu owner did his long ago but thanks for all the pics and info.
I didn't even think of another option besides the brembo's either.
Hopefully you have luck with finding another damper.
Awesome thread! Great detail. Ive looked at the damper when the Malibu owner did his long ago but thanks for all the pics and info.
I didn't even think of another option besides the brembo's either.
Hopefully you have luck with finding another damper.
Thanks very much.
The mods for our cars as you my already know, sometimes require a lot of research, an occasional leap of faith into the uncertain and some creative customizing.
Current Mods
245/45/17 Bridgestone Potenza RE-01 R, 245/45/17 Bridgestone Blizzak WS60, Eibach springs, Debadged, Recessed upper grills, GTP rear valance, GXP exhaust, Redline Tuning QuickLifts, K&N air filter, GMPP strut tower brace, Steering wheel stereo controls, Baer Cobalt 13" front brakes, Cobalt SS 11.75" rear brakes, Stainless steel braided brake lines front & rear, Leather steering wheel, Recessed lower grills, Leather shifter handle, Leather parking brake handle, Leather console lid cover, Volant intake, PIAA H9 & H11 Xtreme White Plus headlights & driving lights, 93 octane tuned ECM & TCM, Custom painted headlights, Motorsport Tech wheel adapters, C5 Corvette 17" x 8.5" wheels, Koni Sport struts and shocks, MSD 8.5mm Super Conductor plug wires, Racingline polyurethane motor mount inserts... Altered6 Progression Page
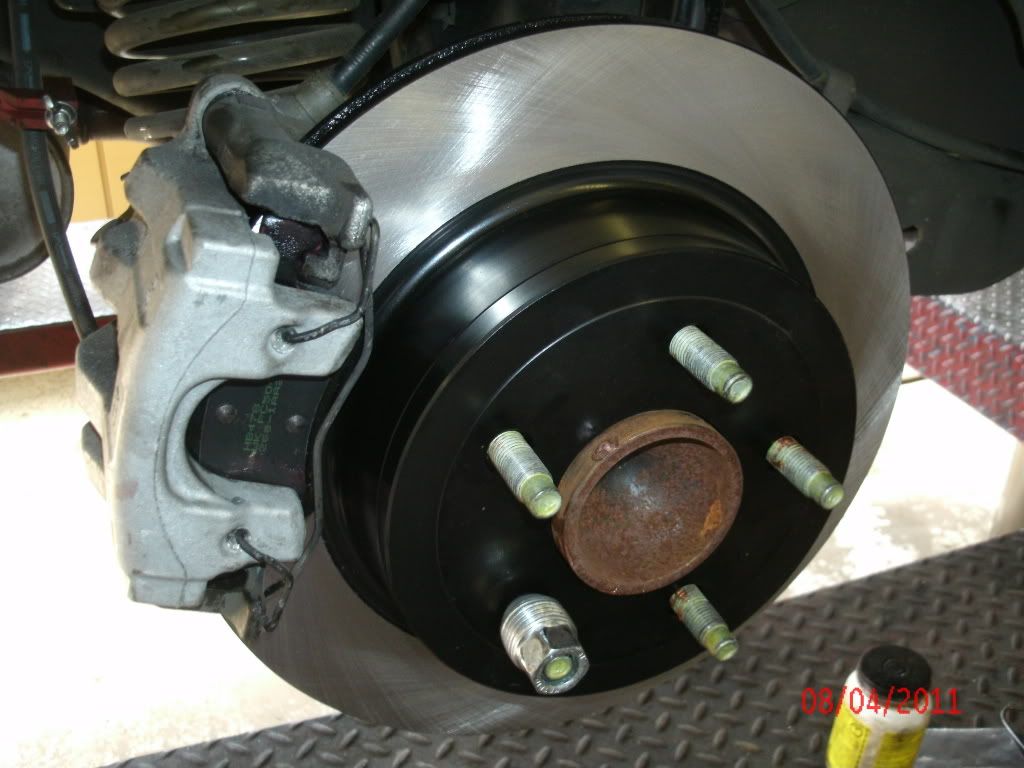
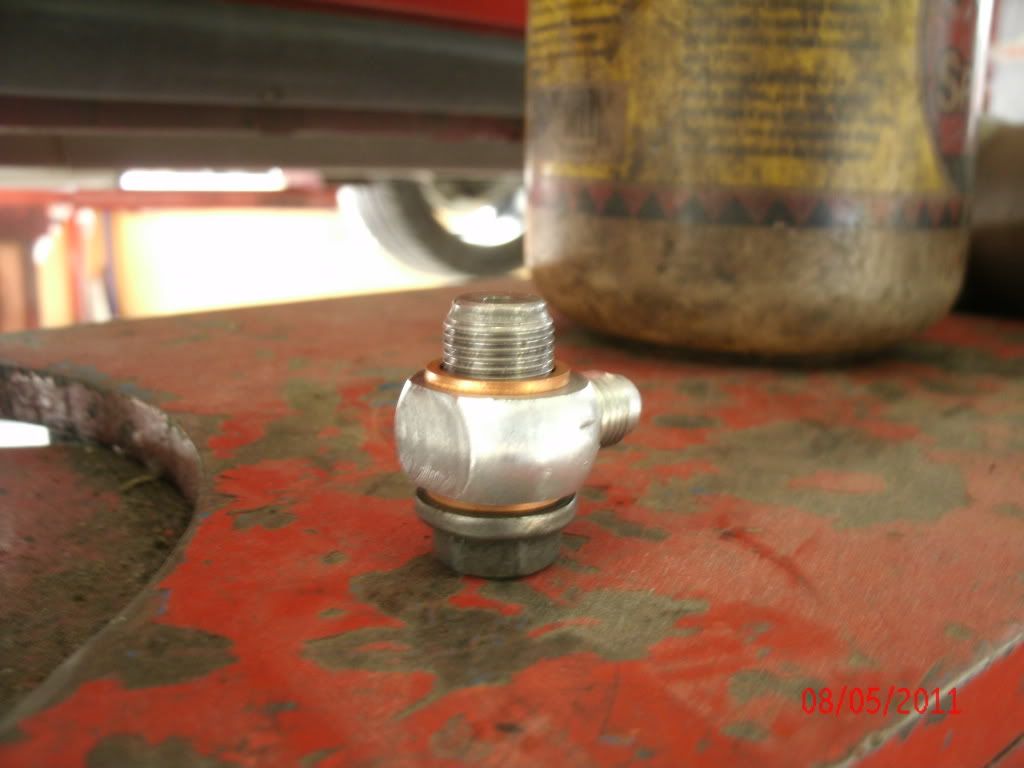
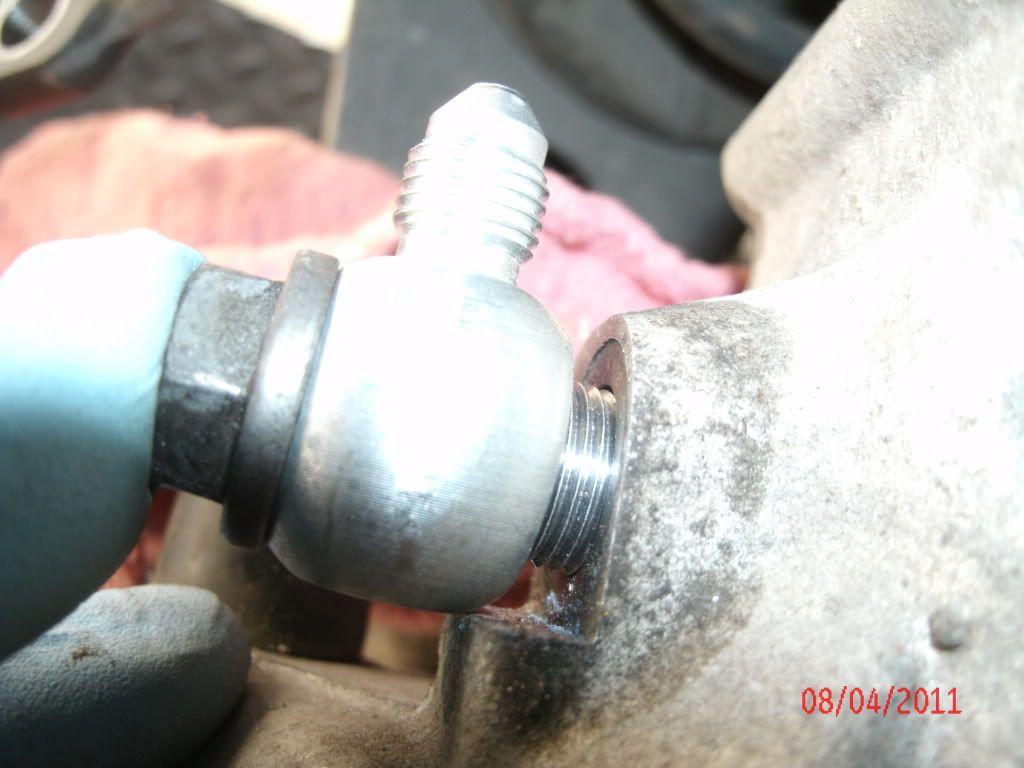
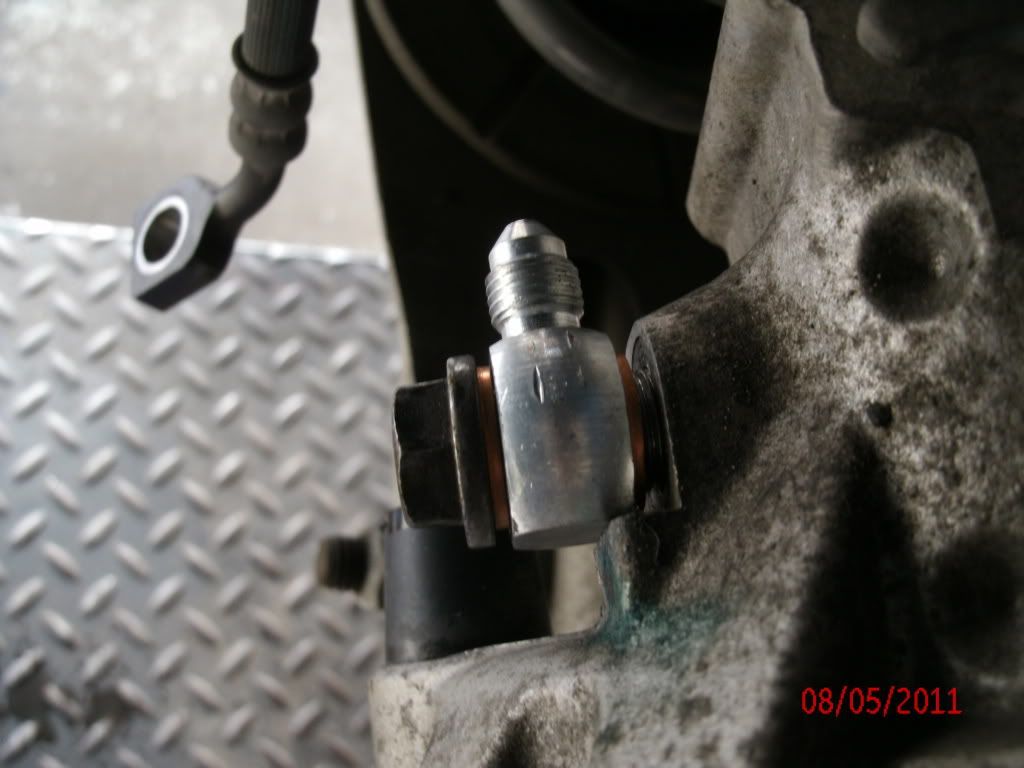
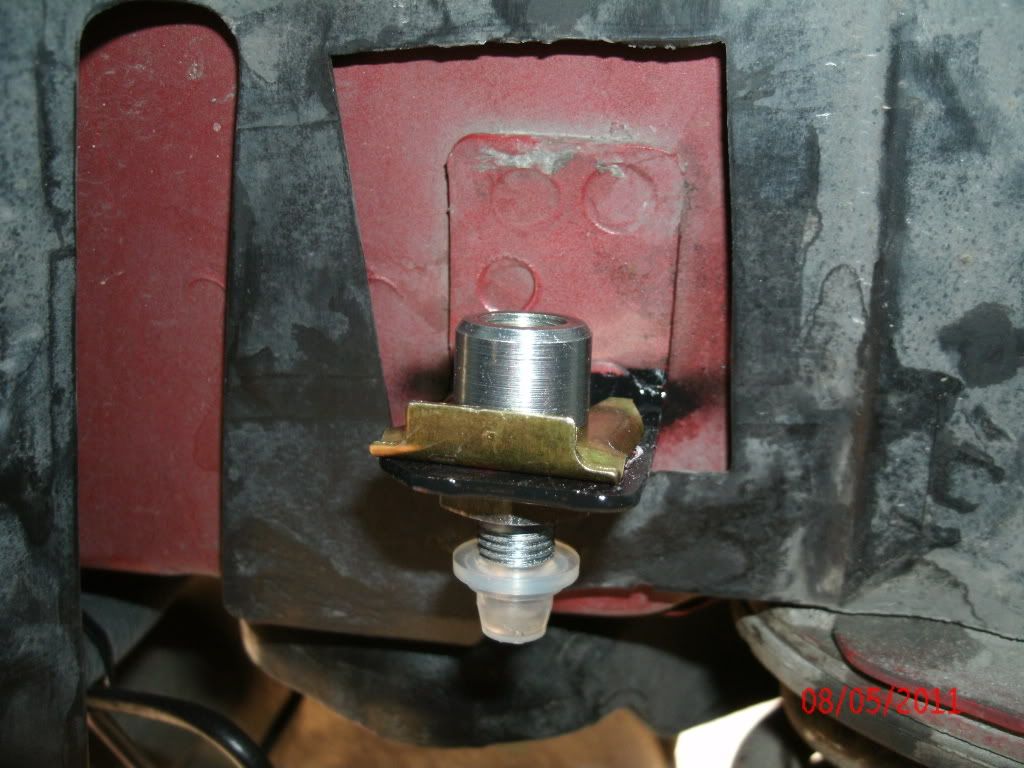
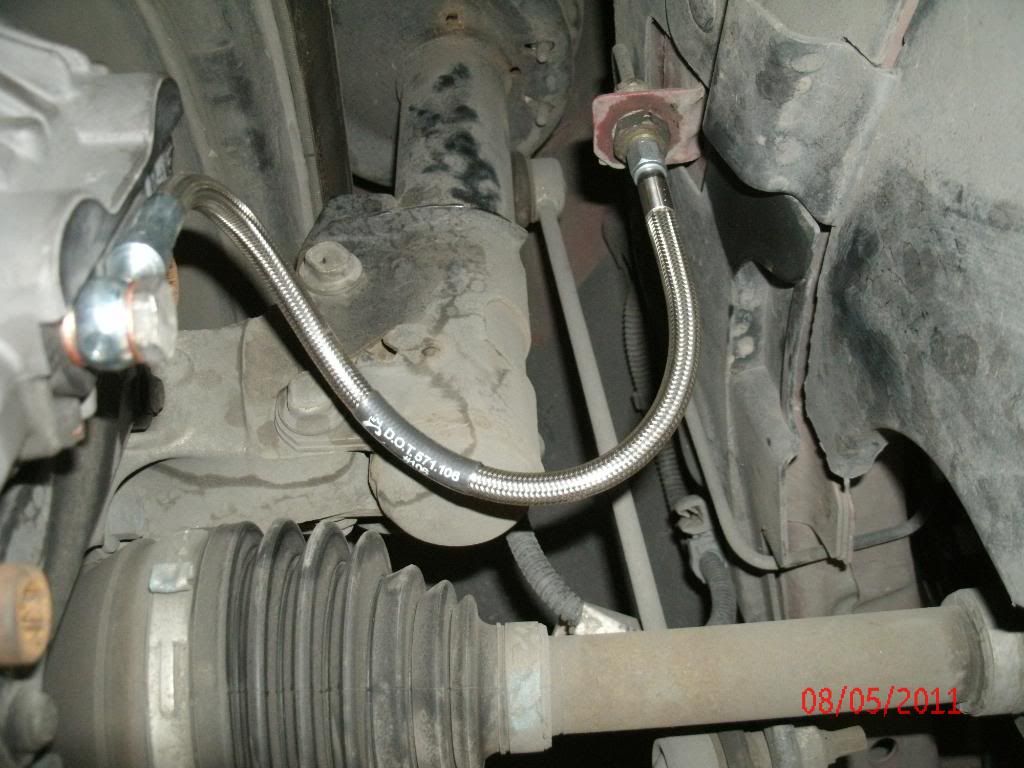
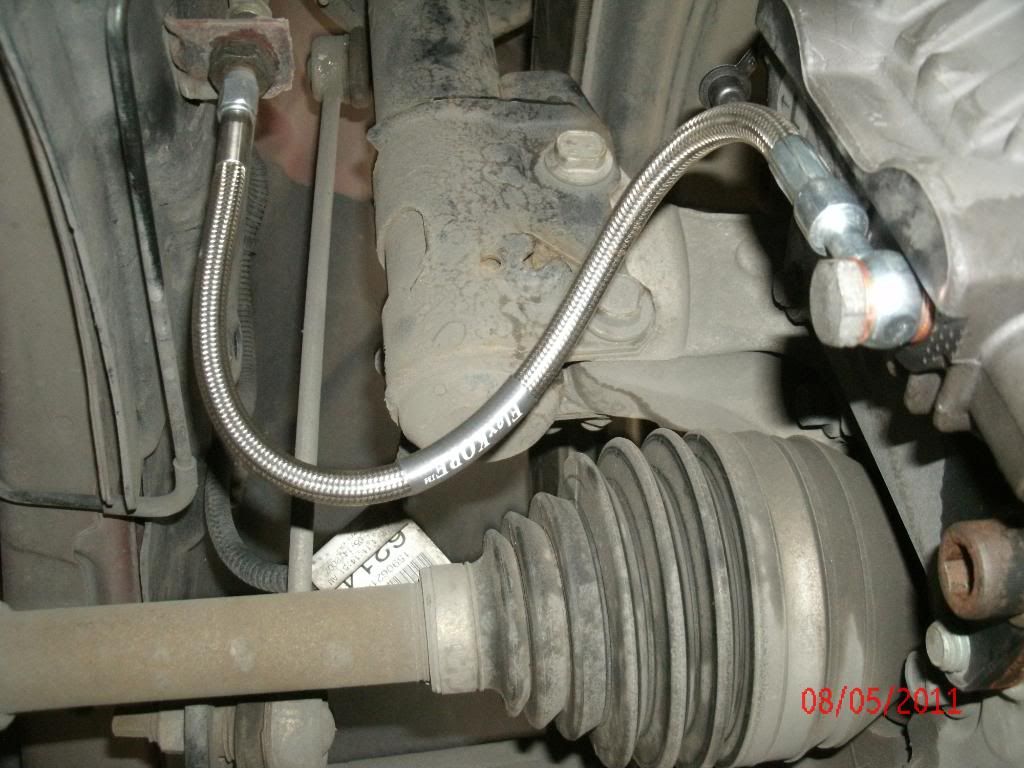
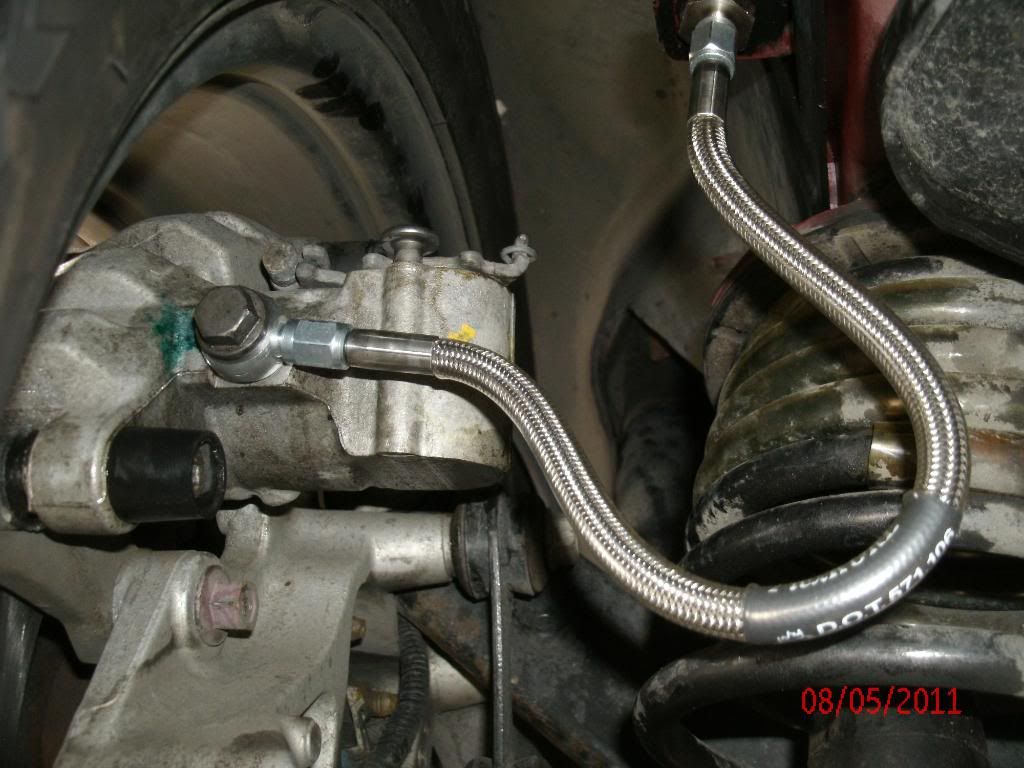
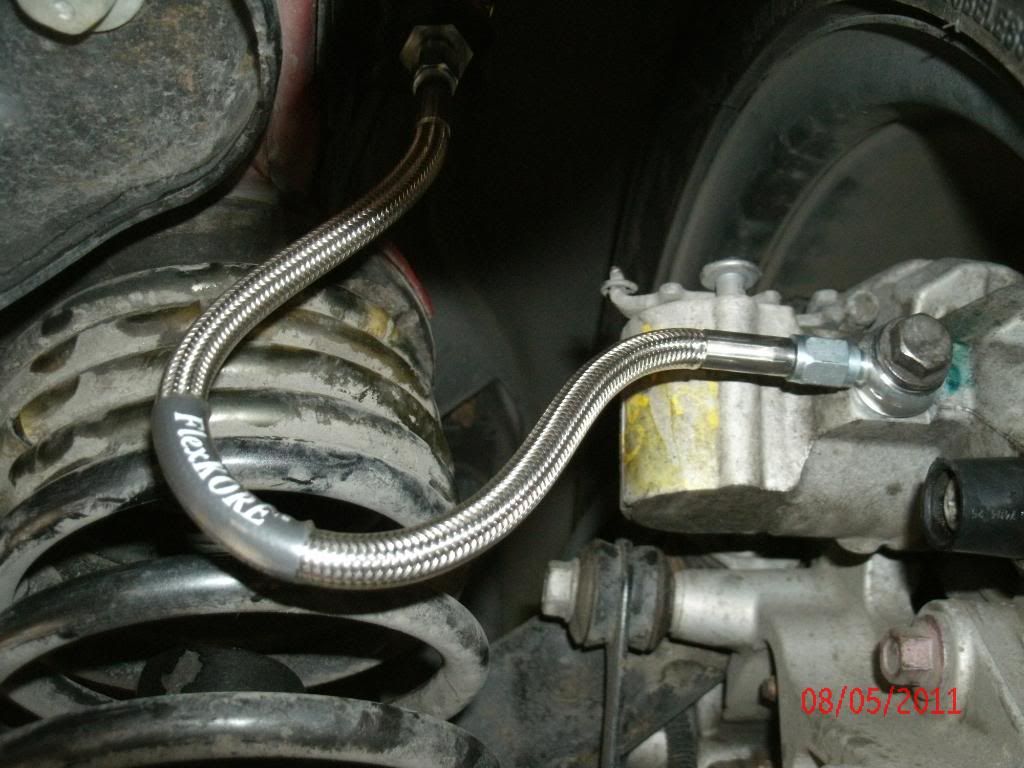
I finally finished my brakes off. I was kicking around the idea of having the hat machined off of the OEM rear rotors and combining them with custom aluminum hats made by Baer but at a glance the OEM rotors may not have enough material on them to allow them to mate up with custom hats. I purchased these rotors from the Tirerack because they more closely match the front rotors with the black hats. I had the stainless steel braided brake lines custom made. The stainless steel lines are beautiful high quality pieces but the rear brake lines required more customization then I was expecting and wanted to deal with. The main issue revolves around the odd 12mm banjo bolt fitting to the rear Cobalt SS calipers. For starters the banjo bolt fitting that was supplied with the lines was too tall to work with the OEM banjo bolt and had to be machined accordingly. Next the banjo bolt fitting had to be machined to fit the caliper. If you are the average DIY'er or don't have access to milling machines one would be some what fucked at this point. In the end I'm happy with the results and it is all worth the effort.
The goods
Supplied 12mm banjo bolt fitting was too tall
After milling process
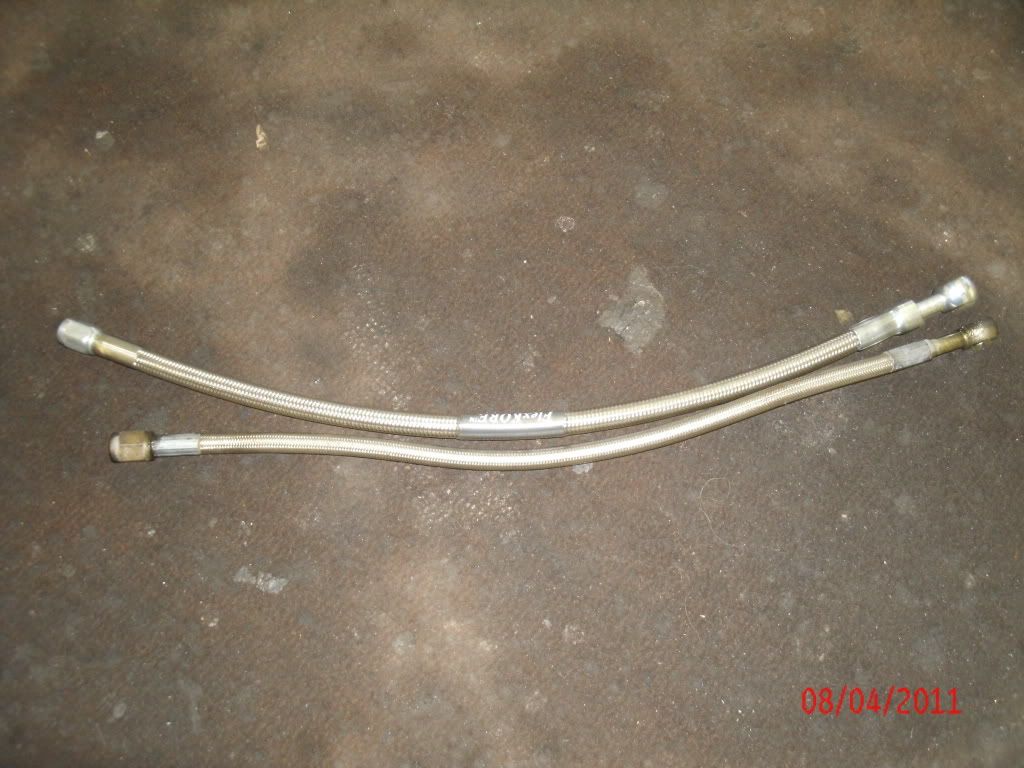
Fitting as supplied from manufacturer
Fitting after machining process
The bottom brake line is the one supplied in Baer's Cobalt brake kit

 Tweet
Tweet
 2012 AWD Fusion Sport...
 My Progress thread
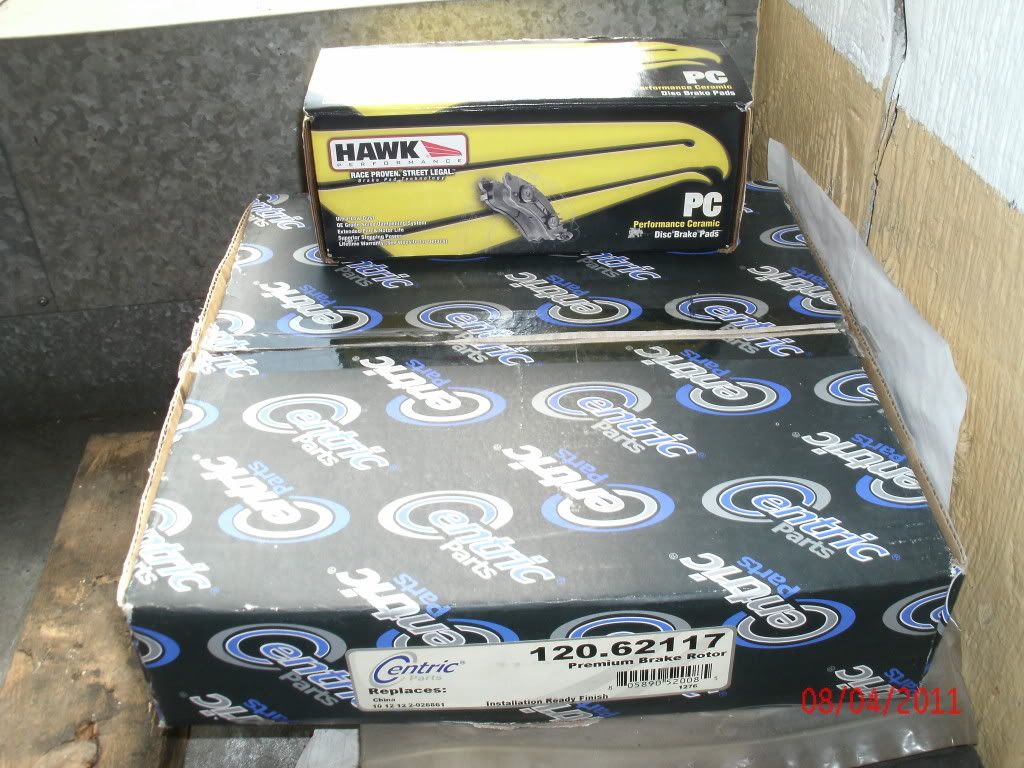


Comment