
 Tweet
Tweet
Alright guys, here's my attempt at writing up a how-to for this. Luckily I took pictures when I was installing it. However, I already had my intake resonator removed, so I don't have any pics for that. Sorry. You can find write ups on here about how to do that. Ok here we go:
Tools you'll need:
---------------------
2 Small Flathead Screwdrivers
5/32" Torx Screwdriver (Or Allen Wrench)
Ratchet
7mm Socket
10mm Socket
Socket Extension
Larger Flathead Screwdriver
1. Pop hood and remove six plastic bumper plugs. This can be done easily with two small flathead screwdrivers.
2. Remove two bolts on the headlights. They are 7mm.
3. Pull the headlight forward to pop it out of it's ball joint. You may need to pull the center of the bumper forward while you're pulling on the headlight to get the extra space to clear the light over the bumper.
4. If you've already removed the resonator, move on to the next step. If not, here's a crash course. There are three mounts on the resonator. You'll need to feel around with your hand, they're on the right side of the resonator if looking at the car straight on. You can pull the tabs on resonator up and over the mounts on the car to remove it. You may need to cut off the left part of the resonator so that it clears the space where the headlight was.
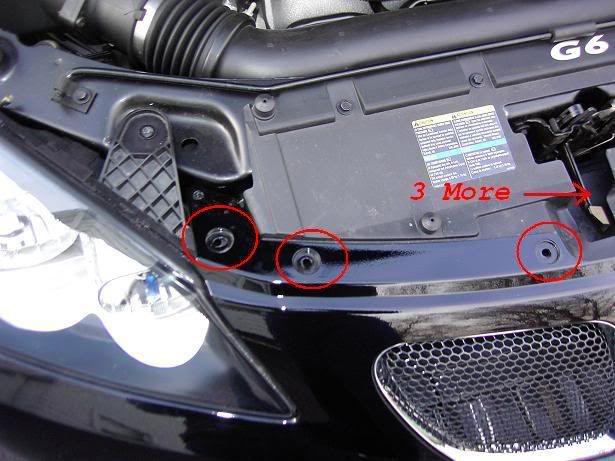
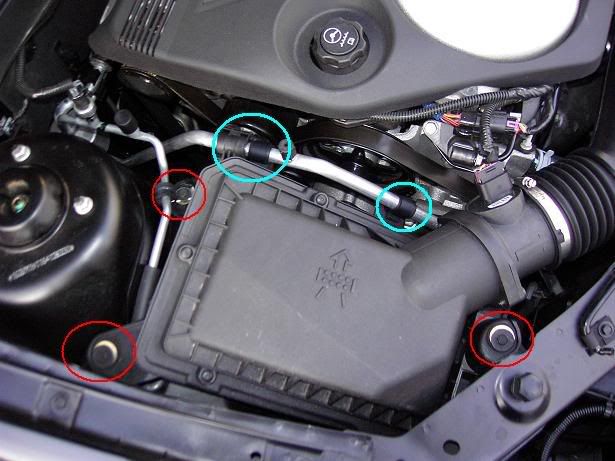
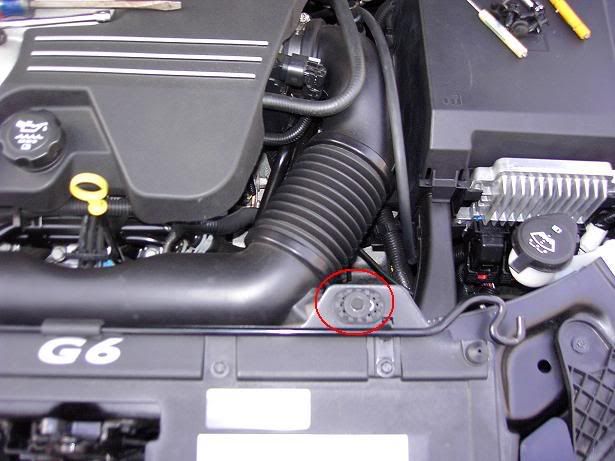
5. Now loosen the airbox. There are 3 bolts, 10mm in size. They are circled in red in the pic below. The blue circles point out the two clips that hold the airbox to the metal line next to it. These just unclip off and over the lines.
6. You may also want to loosen the bolt that mounts the intake tube to the front of the car, over near the throttle body. This lets you move the whole assembly around a little easier. Also a 10mm bolt.
7. At this point you may also wish to disconnect the MAF plug from the sensor, so you don't damage the wires with all the pulling you're about to do. To get it off, you need to remove the gray plastic piece first. It is clipped on so you may need a small flathead screwdriver to pop it off. Then just squeeze the black tab it was over, and pull to disconnect the plug from the MAF.

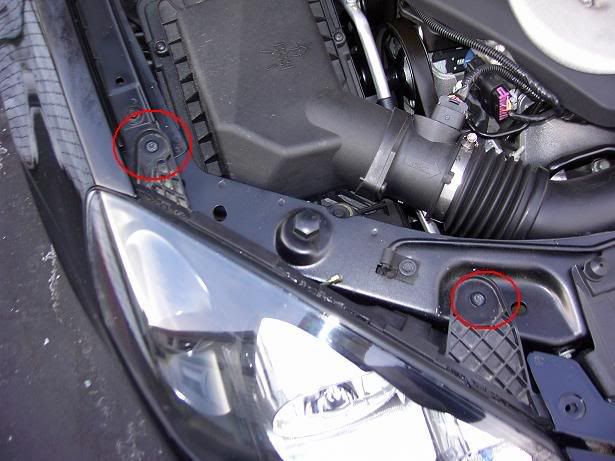
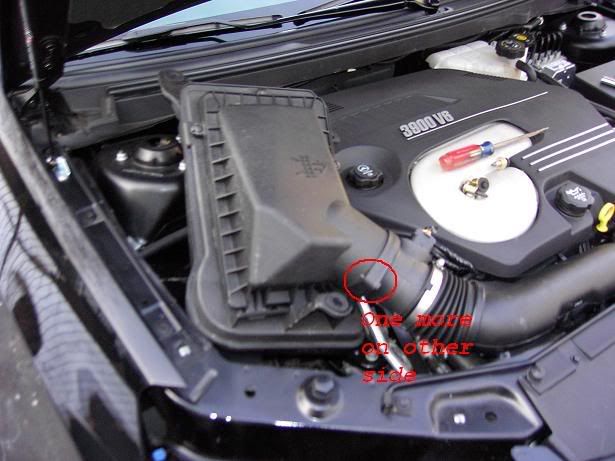
8. Now you should be able to pull out the airbox. You may catch a few parts on the car while pulling it out, so you'll need to tilt the box around until you can pull it out as shown below. Now you can remove the torx screws on the MAF (Mass Air Flow sensor), circled in the pic. The size of the screws is 5/32".
9. Now remove the airbox from the MAF. Also remove the yellow gasket on the MAF. You won't be needing this for the intake though.
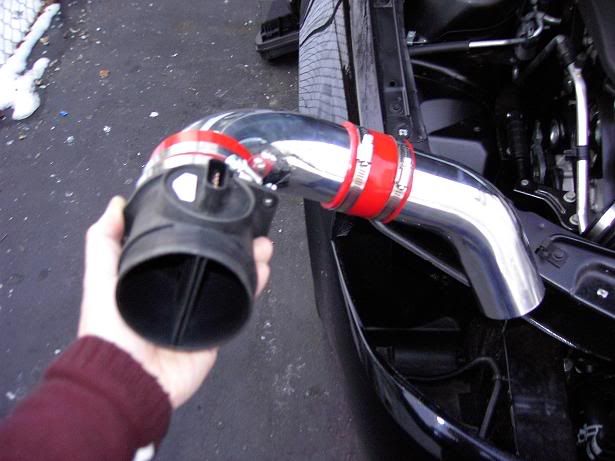
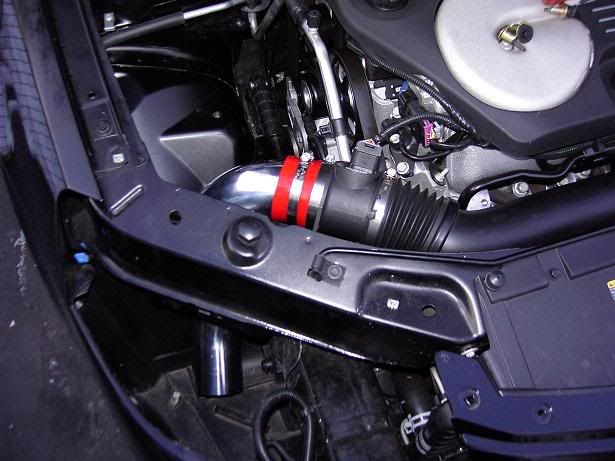
10. Assemble the intake as shown. Don't tighten down the clamps completely yet though, because you may need to twist the pipes to get a good fitment.
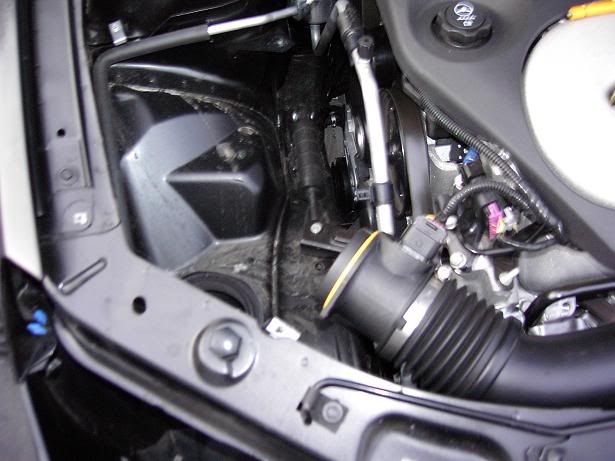
11. Place the intake pipe through the hole where the intake resonator was, and attach the other end with the MAF back onto the stock tubing. Now is a good time to place some type of foam padding around the hole so that the pipe doesn't rub against the metal edges too much. The GTPs come with this type of padding already, but you may wish to put more to help the pipe from moving around.
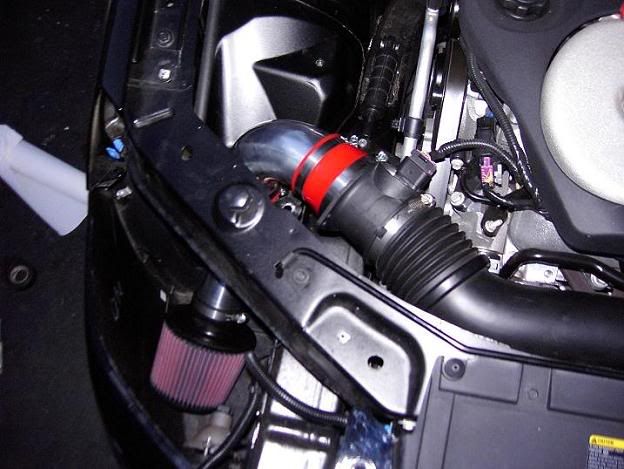
12. Now attach the air filter. You may have some issues with it touching the foglight or the bumper. You can either place it in between the foglight and bumper so that it doesn't move, or cut about 1.5" off the pipe that the filter clamps onto. That will solve any fitment issues down there. Once you have the filter where you like it, you can tighten down all the clamps.
13. Reconnect the plug to the MAF, replace the 10mm bolt on the intake tubing near the throttle body, reinstall the headlight (don't forget to reconnect it!), and replace the bumper plugs. And you're done!
Happy modding!
Tools you'll need:
---------------------
2 Small Flathead Screwdrivers
5/32" Torx Screwdriver (Or Allen Wrench)
Ratchet
7mm Socket
10mm Socket
Socket Extension
Larger Flathead Screwdriver
1. Pop hood and remove six plastic bumper plugs. This can be done easily with two small flathead screwdrivers.
2. Remove two bolts on the headlights. They are 7mm.
3. Pull the headlight forward to pop it out of it's ball joint. You may need to pull the center of the bumper forward while you're pulling on the headlight to get the extra space to clear the light over the bumper.
4. If you've already removed the resonator, move on to the next step. If not, here's a crash course. There are three mounts on the resonator. You'll need to feel around with your hand, they're on the right side of the resonator if looking at the car straight on. You can pull the tabs on resonator up and over the mounts on the car to remove it. You may need to cut off the left part of the resonator so that it clears the space where the headlight was.
5. Now loosen the airbox. There are 3 bolts, 10mm in size. They are circled in red in the pic below. The blue circles point out the two clips that hold the airbox to the metal line next to it. These just unclip off and over the lines.
6. You may also want to loosen the bolt that mounts the intake tube to the front of the car, over near the throttle body. This lets you move the whole assembly around a little easier. Also a 10mm bolt.
7. At this point you may also wish to disconnect the MAF plug from the sensor, so you don't damage the wires with all the pulling you're about to do. To get it off, you need to remove the gray plastic piece first. It is clipped on so you may need a small flathead screwdriver to pop it off. Then just squeeze the black tab it was over, and pull to disconnect the plug from the MAF.
8. Now you should be able to pull out the airbox. You may catch a few parts on the car while pulling it out, so you'll need to tilt the box around until you can pull it out as shown below. Now you can remove the torx screws on the MAF (Mass Air Flow sensor), circled in the pic. The size of the screws is 5/32".
9. Now remove the airbox from the MAF. Also remove the yellow gasket on the MAF. You won't be needing this for the intake though.
10. Assemble the intake as shown. Don't tighten down the clamps completely yet though, because you may need to twist the pipes to get a good fitment.
11. Place the intake pipe through the hole where the intake resonator was, and attach the other end with the MAF back onto the stock tubing. Now is a good time to place some type of foam padding around the hole so that the pipe doesn't rub against the metal edges too much. The GTPs come with this type of padding already, but you may wish to put more to help the pipe from moving around.
12. Now attach the air filter. You may have some issues with it touching the foglight or the bumper. You can either place it in between the foglight and bumper so that it doesn't move, or cut about 1.5" off the pipe that the filter clamps onto. That will solve any fitment issues down there. Once you have the filter where you like it, you can tighten down all the clamps.
13. Reconnect the plug to the MAF, replace the 10mm bolt on the intake tubing near the throttle body, reinstall the headlight (don't forget to reconnect it!), and replace the bumper plugs. And you're done!
Happy modding!


Comment