Announcement

Collapse
No announcement yet.

HOW TO - Completely Retrofit your Spyder Housing...

Collapse
X
 
  • Filter
  • Time
  • Show
Clear All
new posts

  • HOW TO - Completely Retrofit your Spyder Housing...

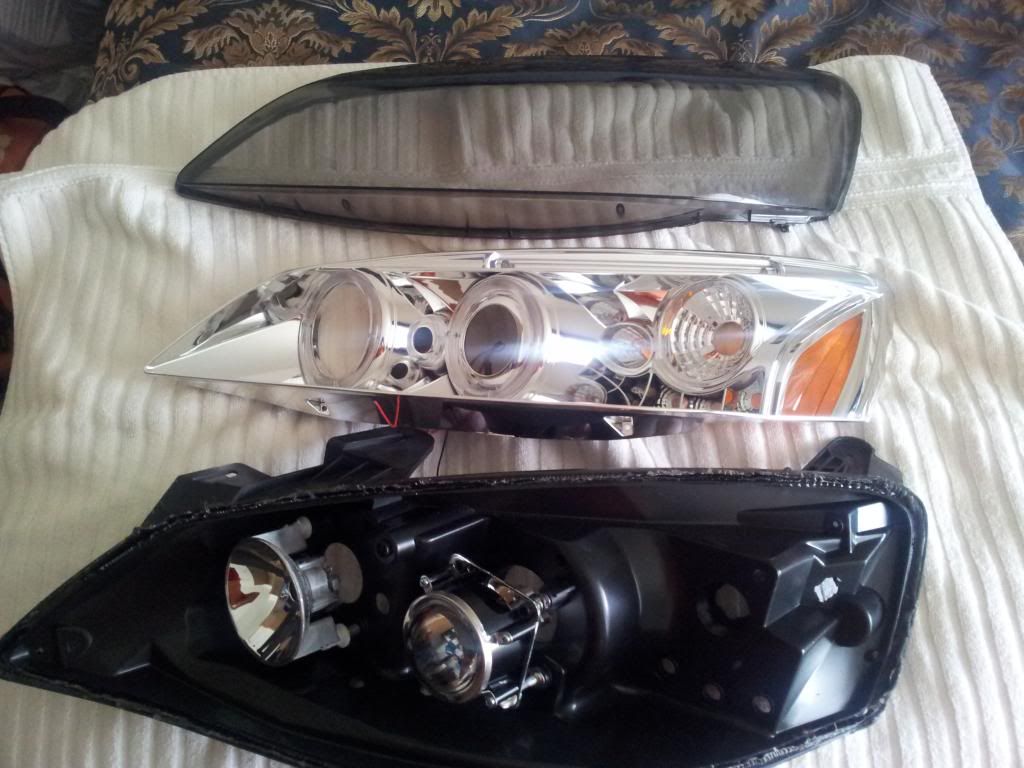
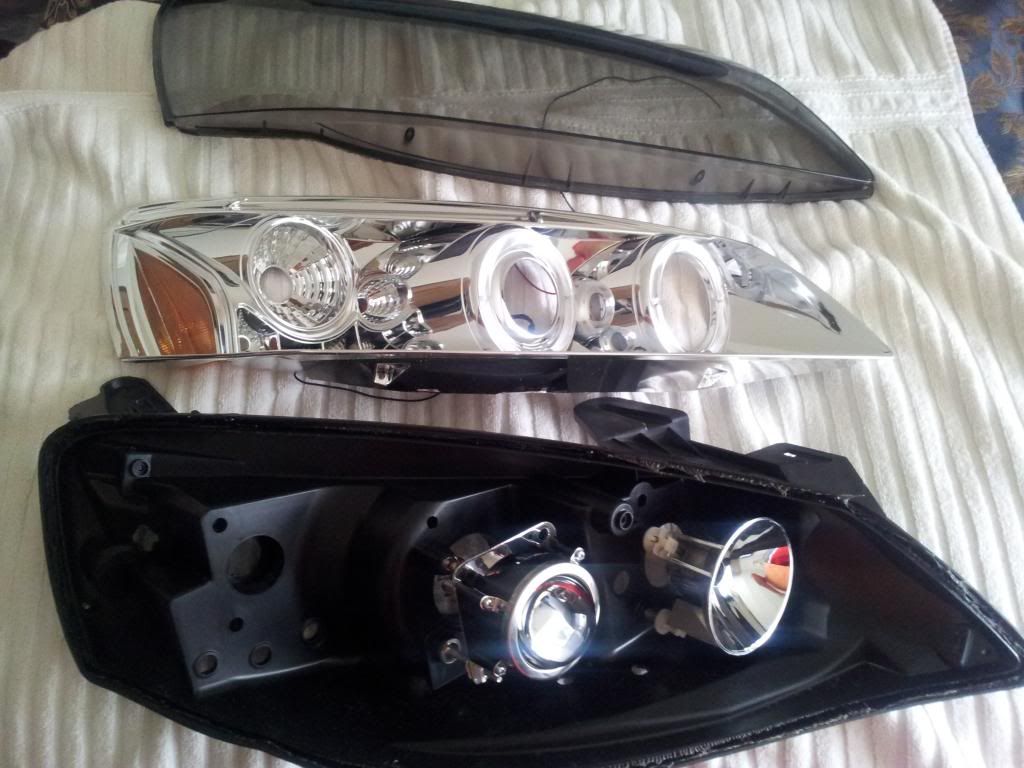
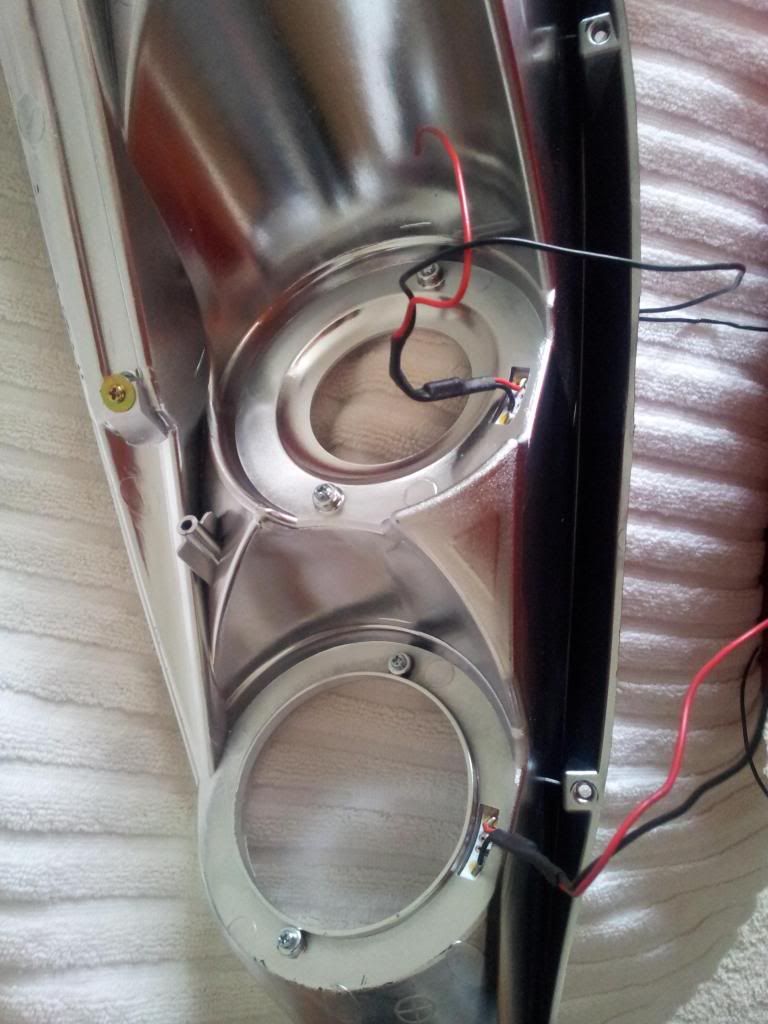
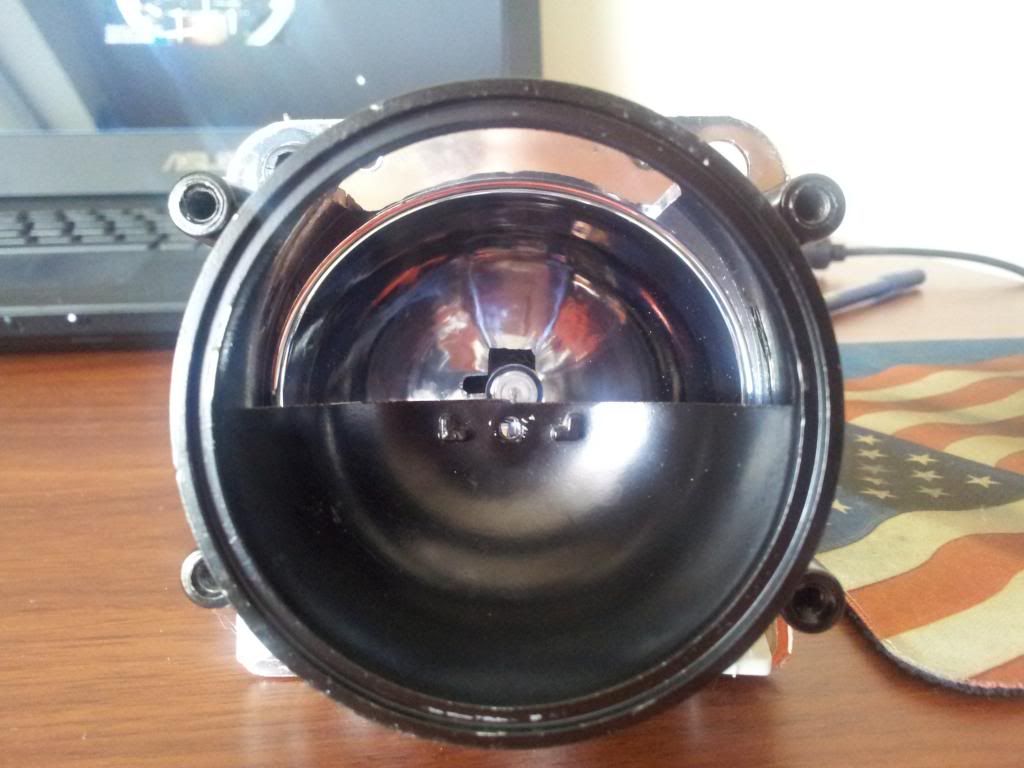
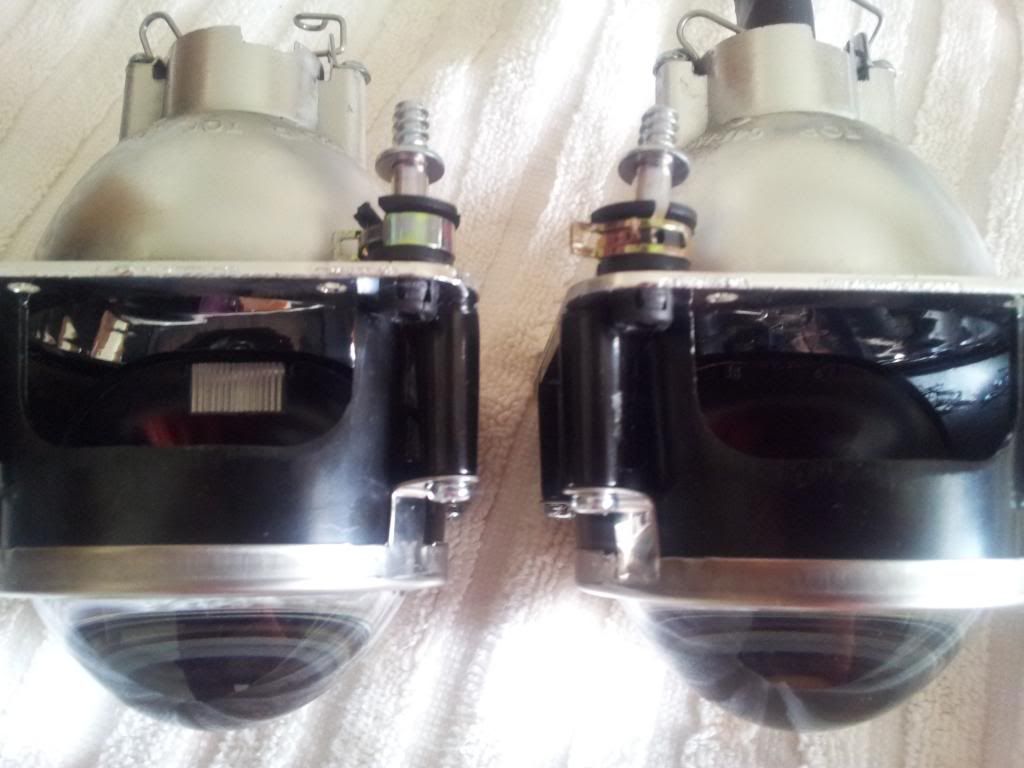
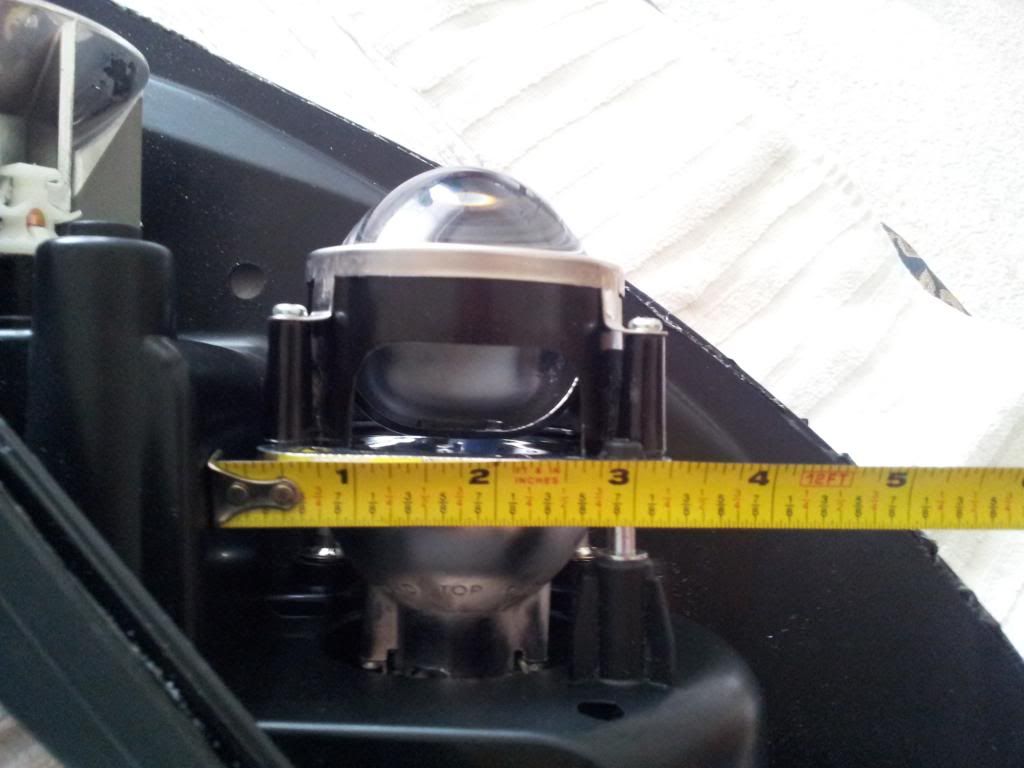
    SO I started to make some modifications to the Spyder headlights...that is take them apart lol. Its pretty easy to take them apart...all you have to do is remove all the screws, clips and take the harness out; lights bulbs, wires, rubber grommet etc,. Then pre heat your oven to about 200 degrees F and bake them for about 5 min... they should be easy to pry off then. After you do all that there are to more screws on the bottom that will allow you to take the inner part off of the lens and you should get something like this...


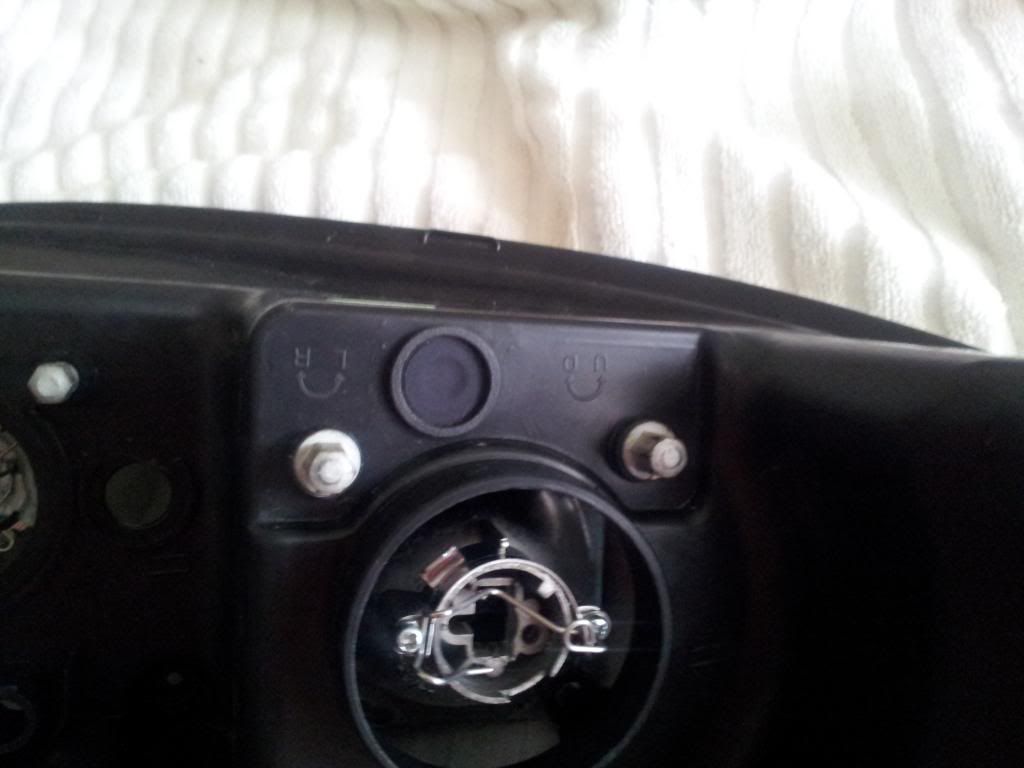
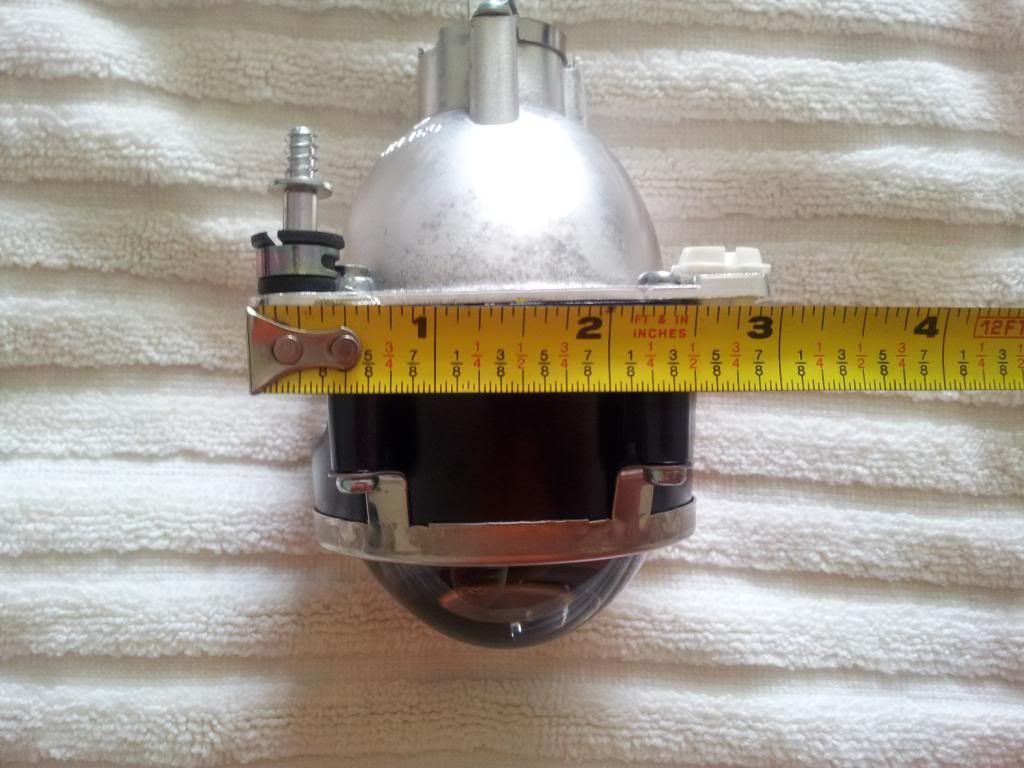
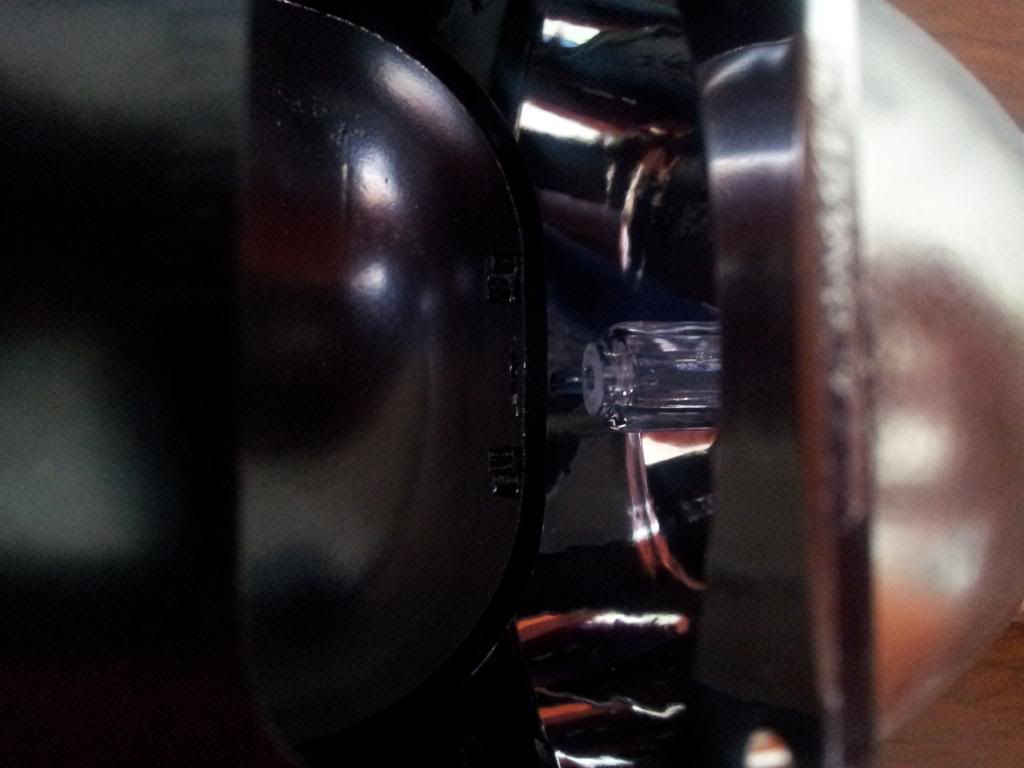
    To take the projectors/xenon out you will have to get a small Philips screwdriver and unscrew the the one hidden screw that is to the left of the projector where you see a small rubber grommet.


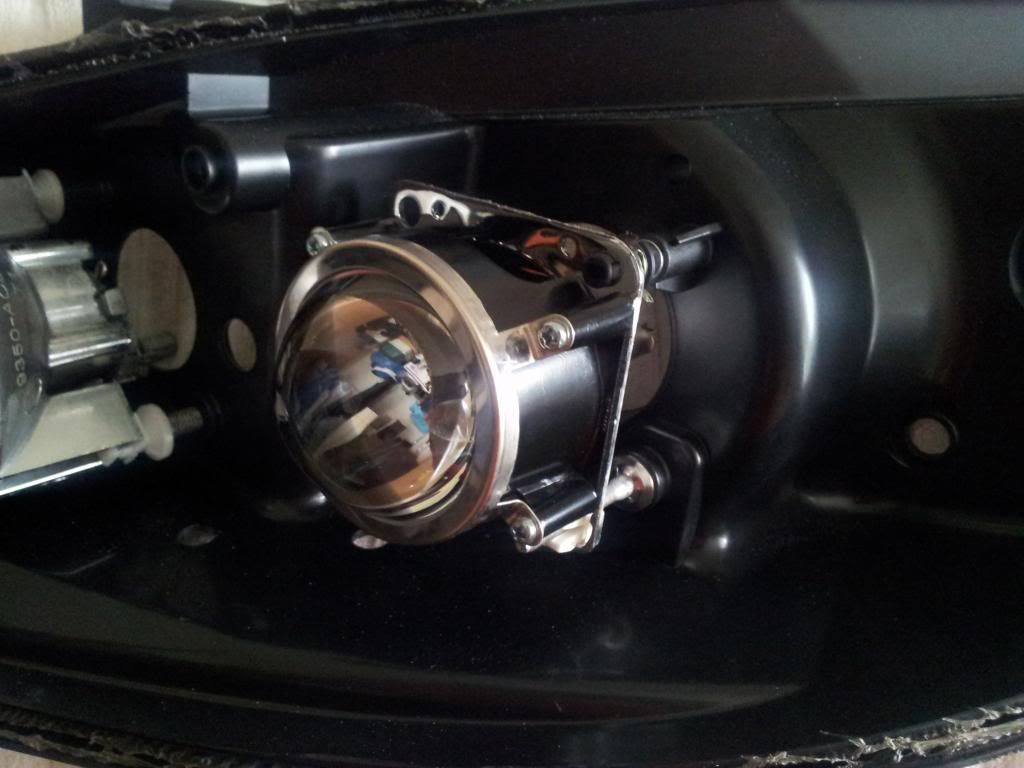
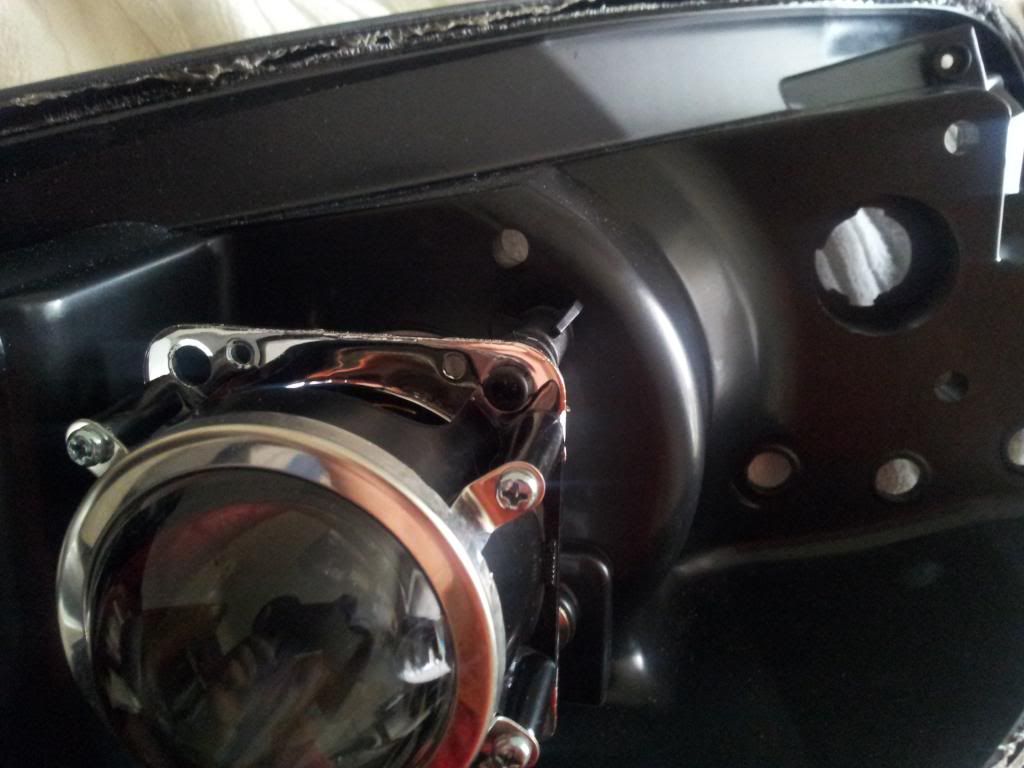
    ***While you turn the knobs on the back of the housing to push the projector out***

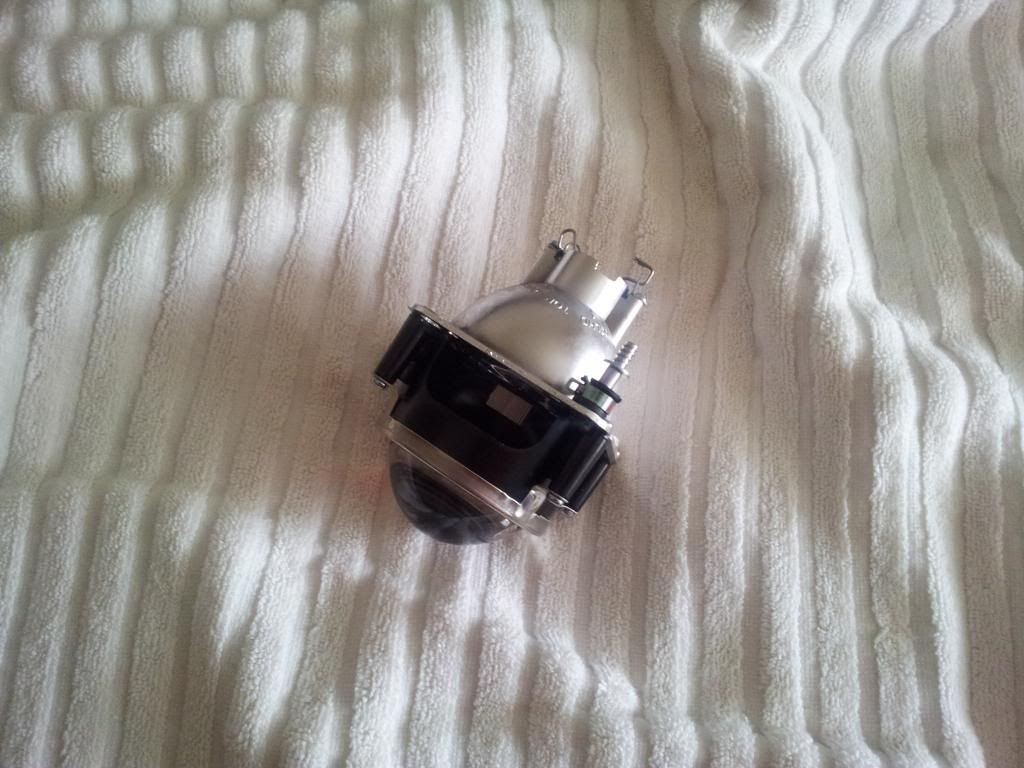
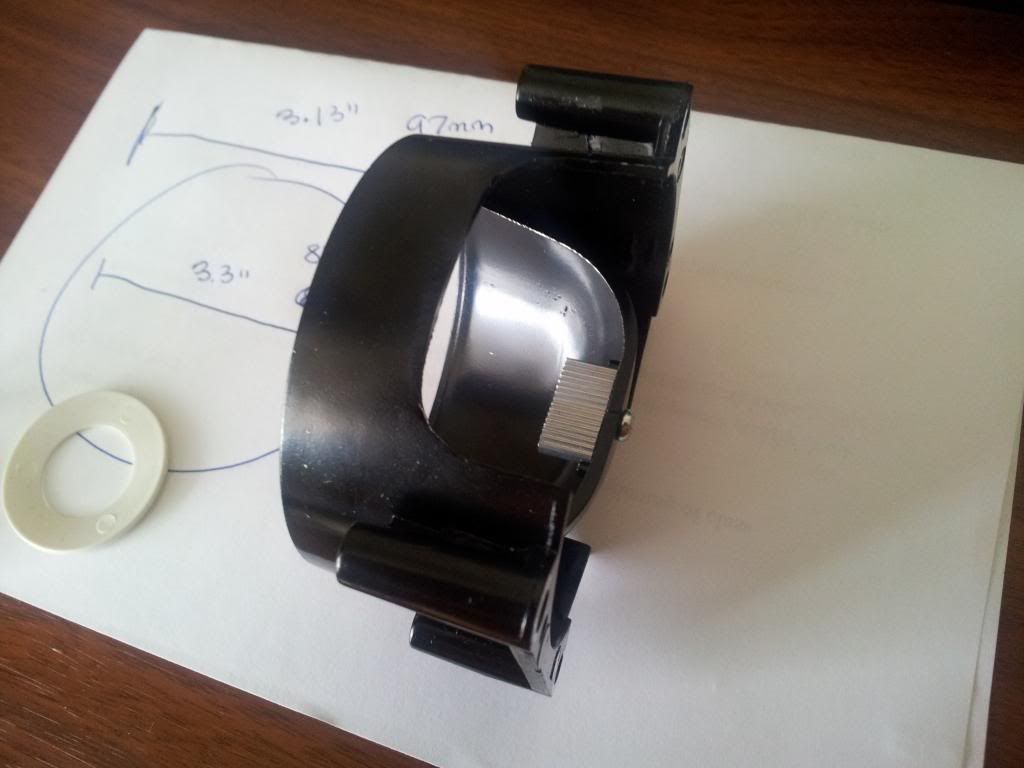
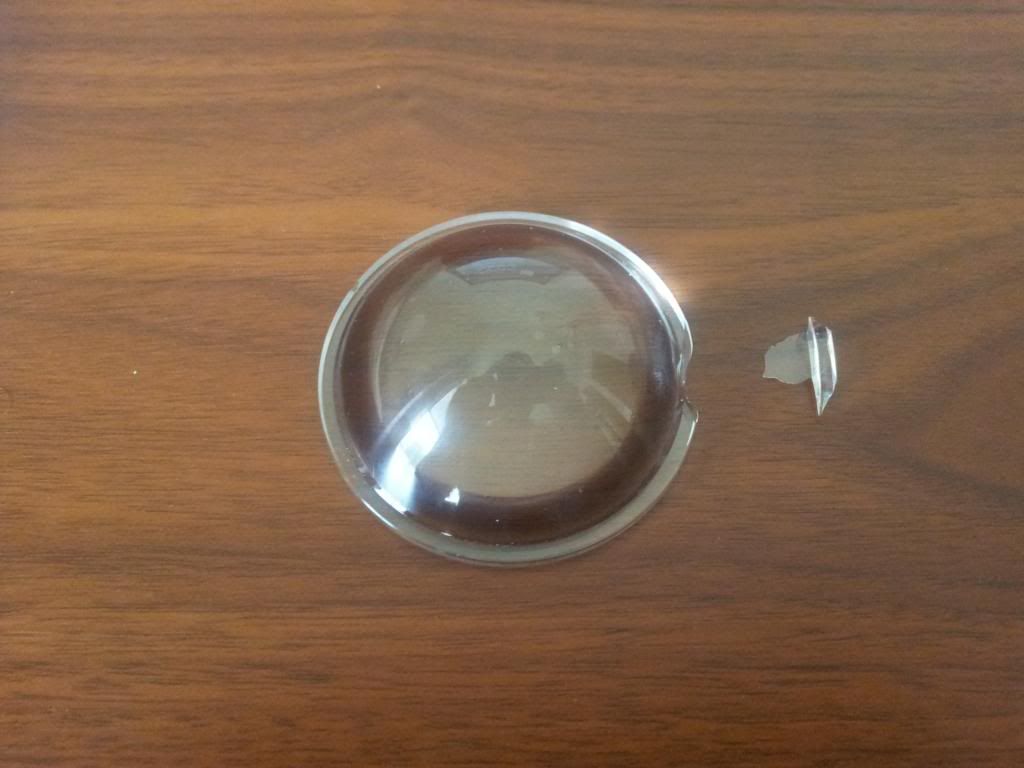
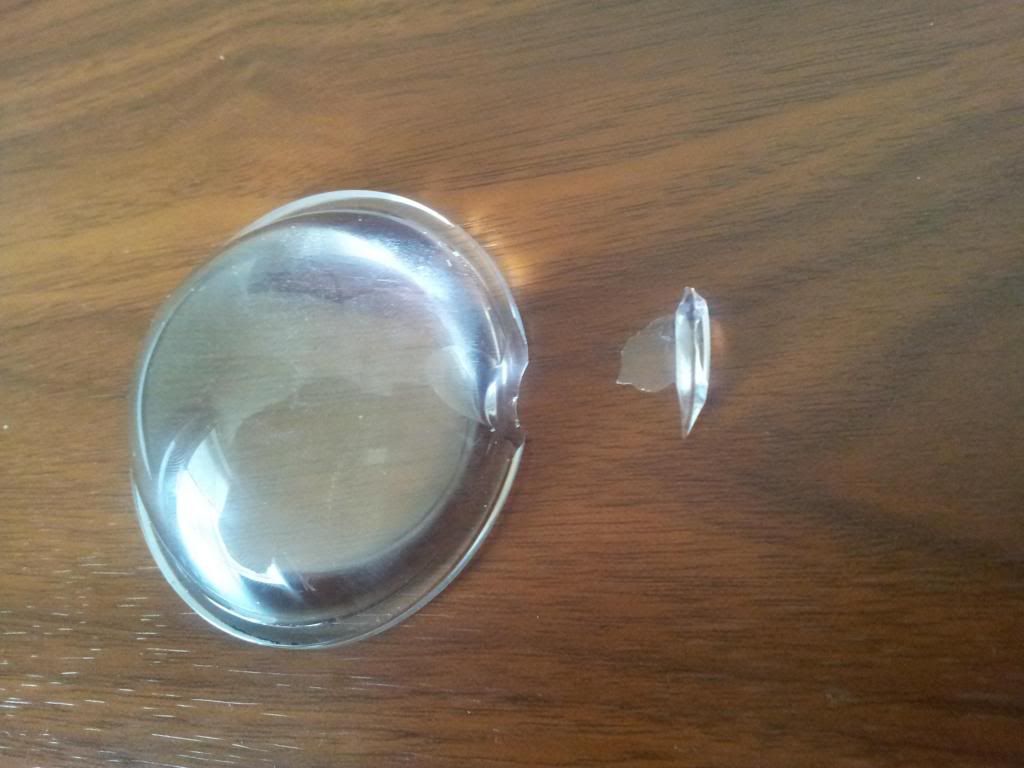
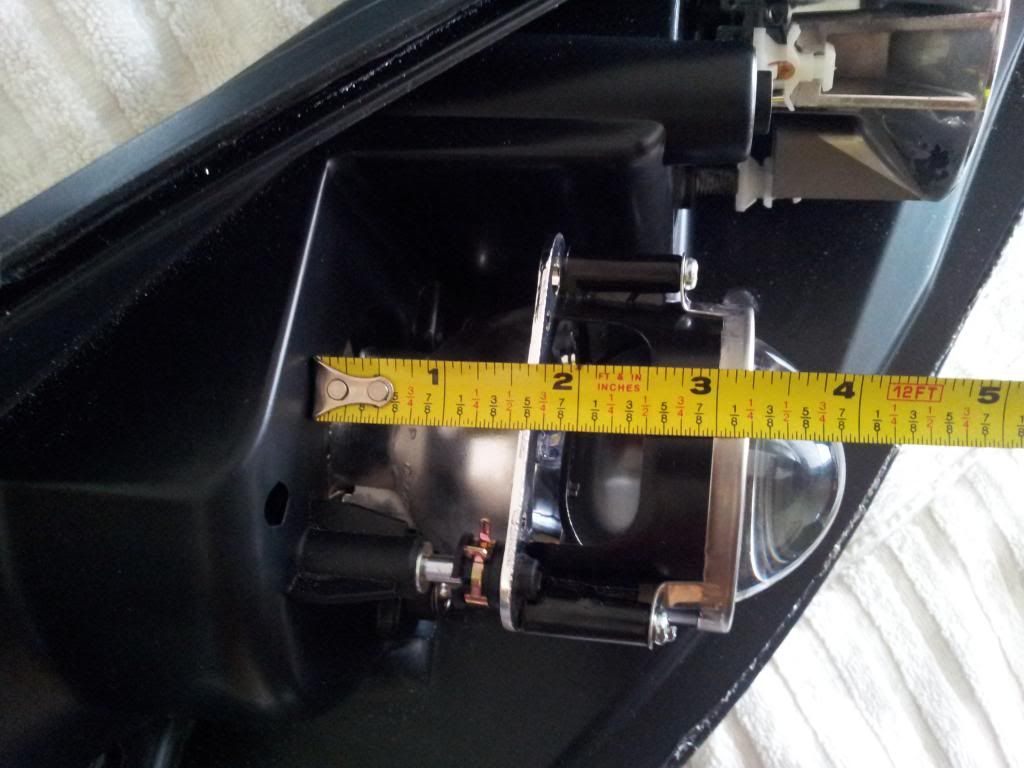
    After you did that you should get something like this...

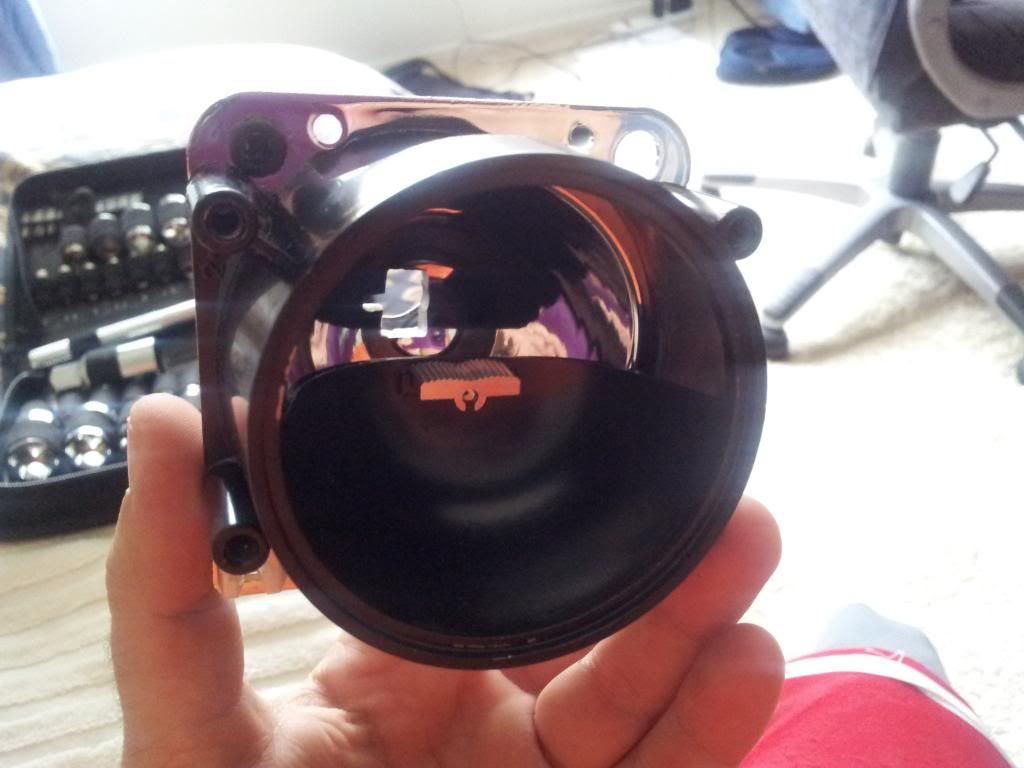
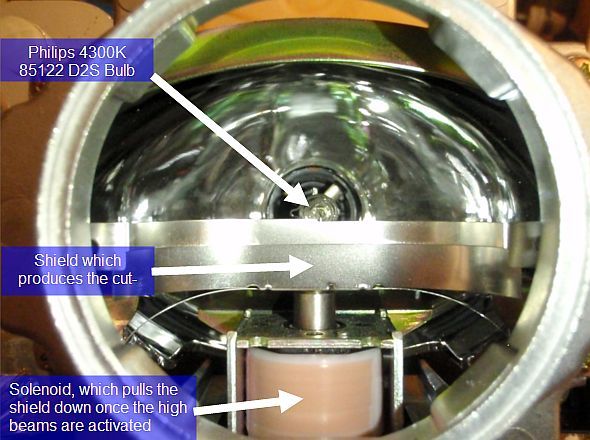
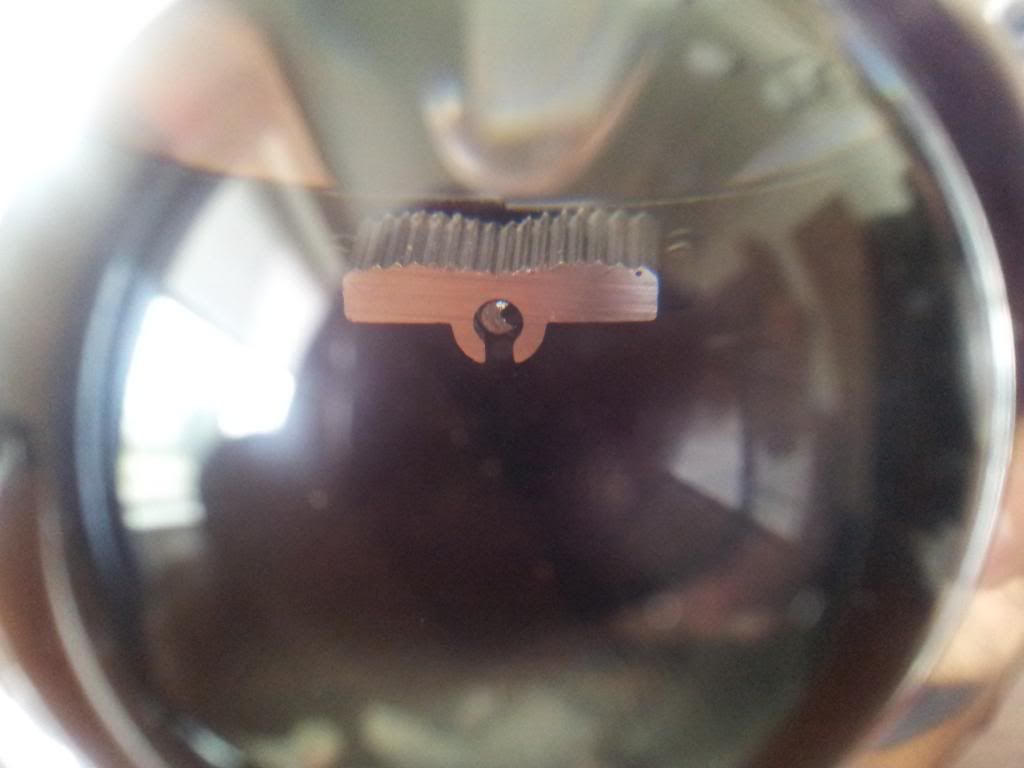
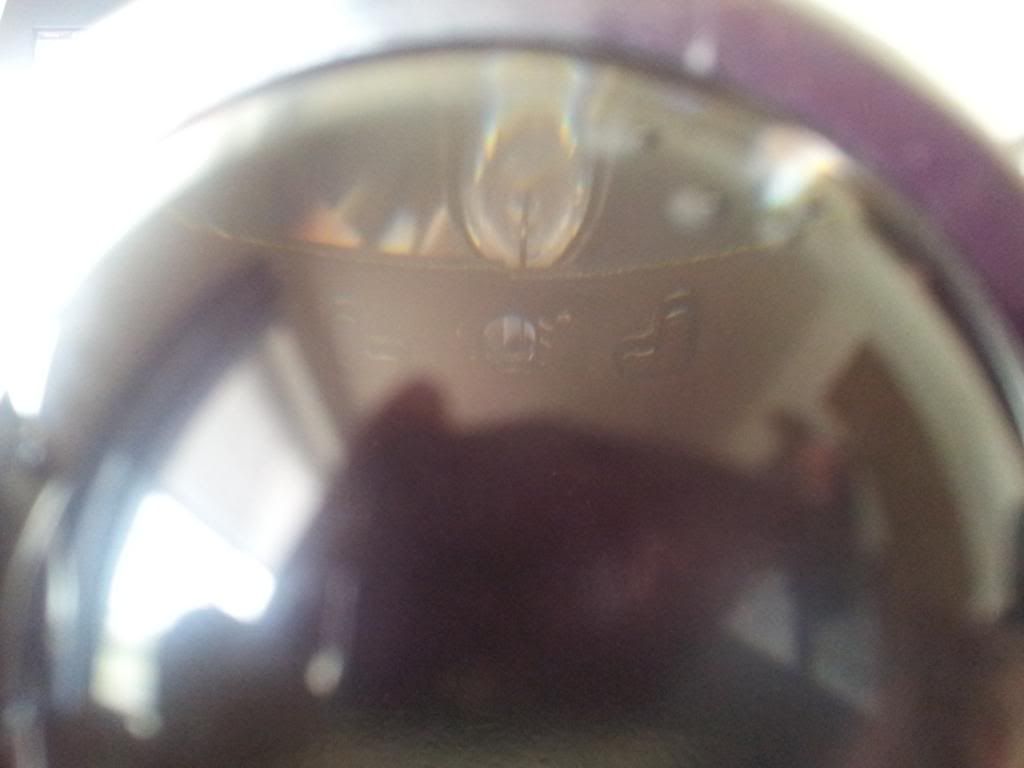
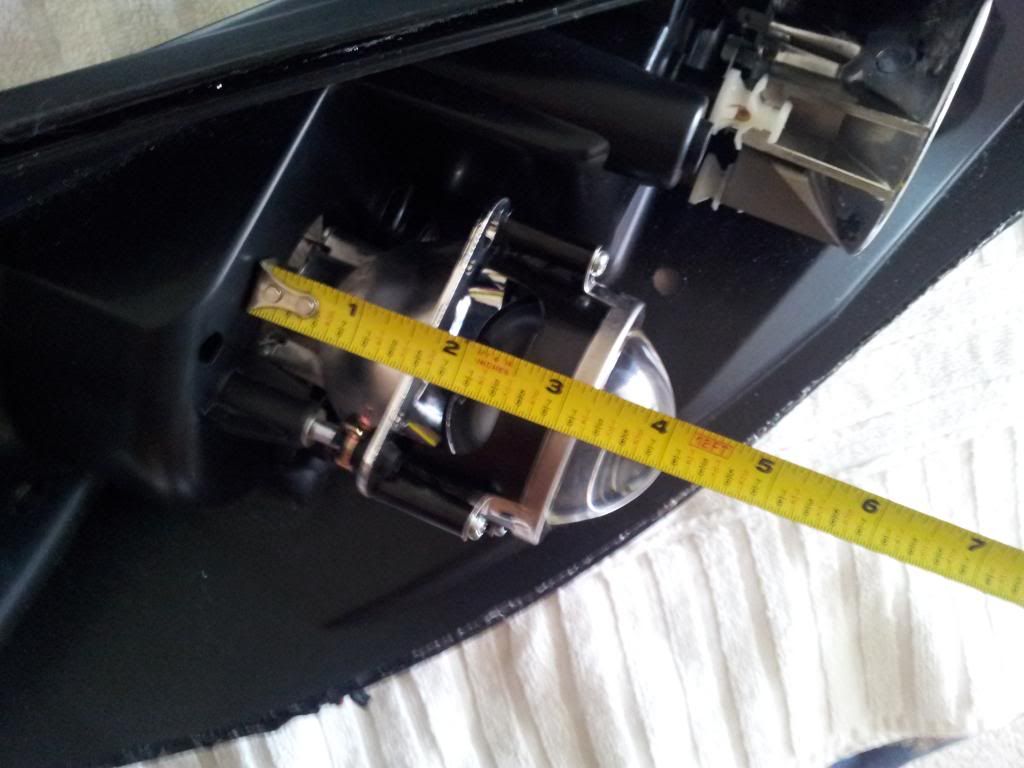
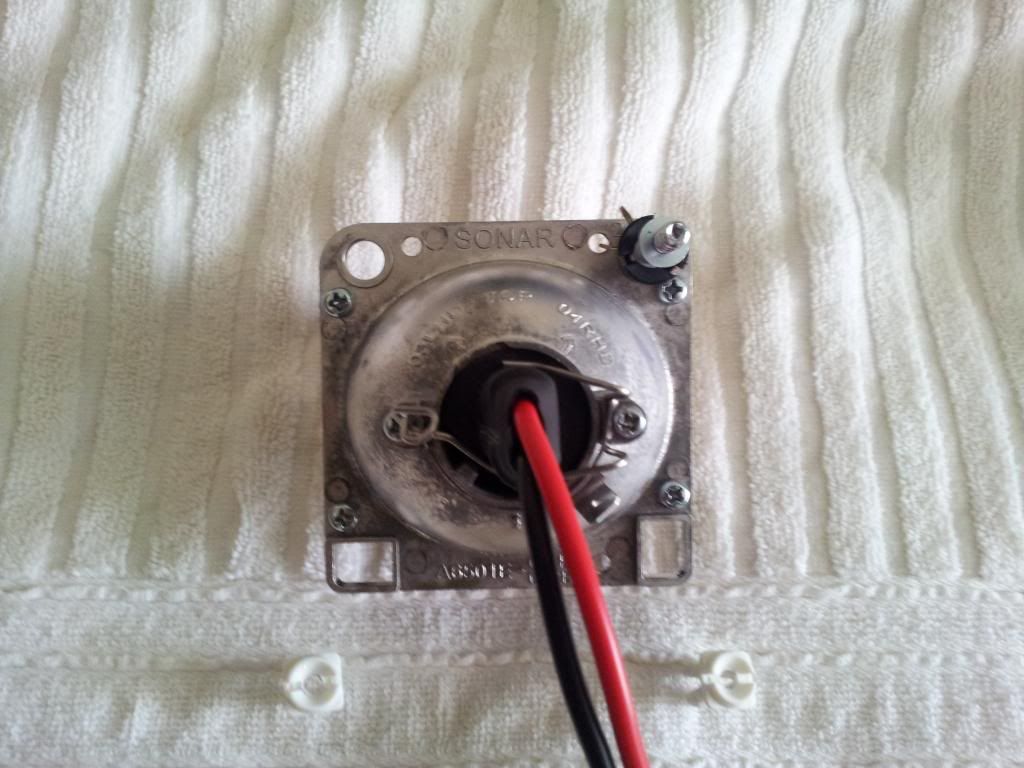
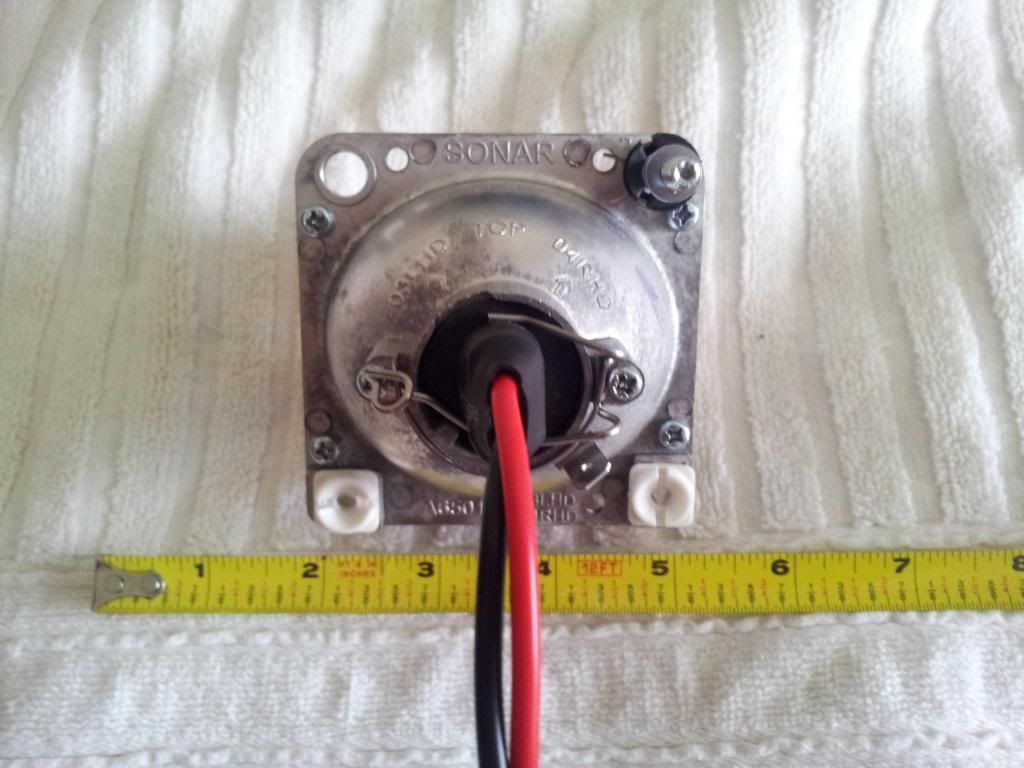
    This is how the inside of the projector looks if you decide to that the 4 screws on the front:

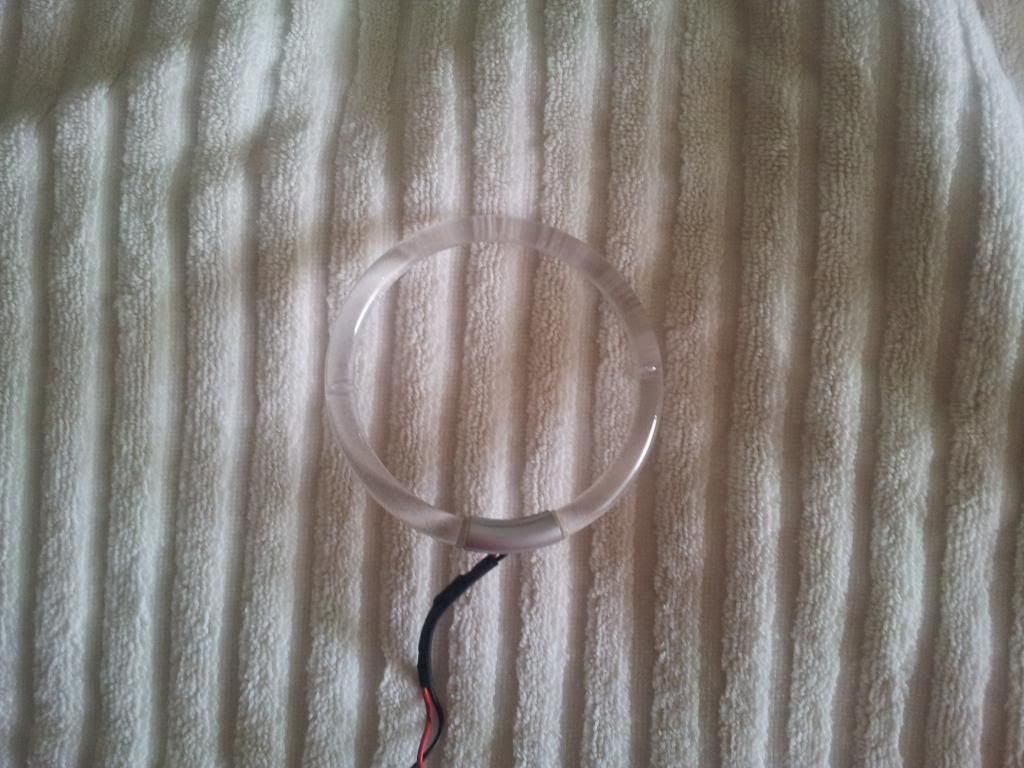
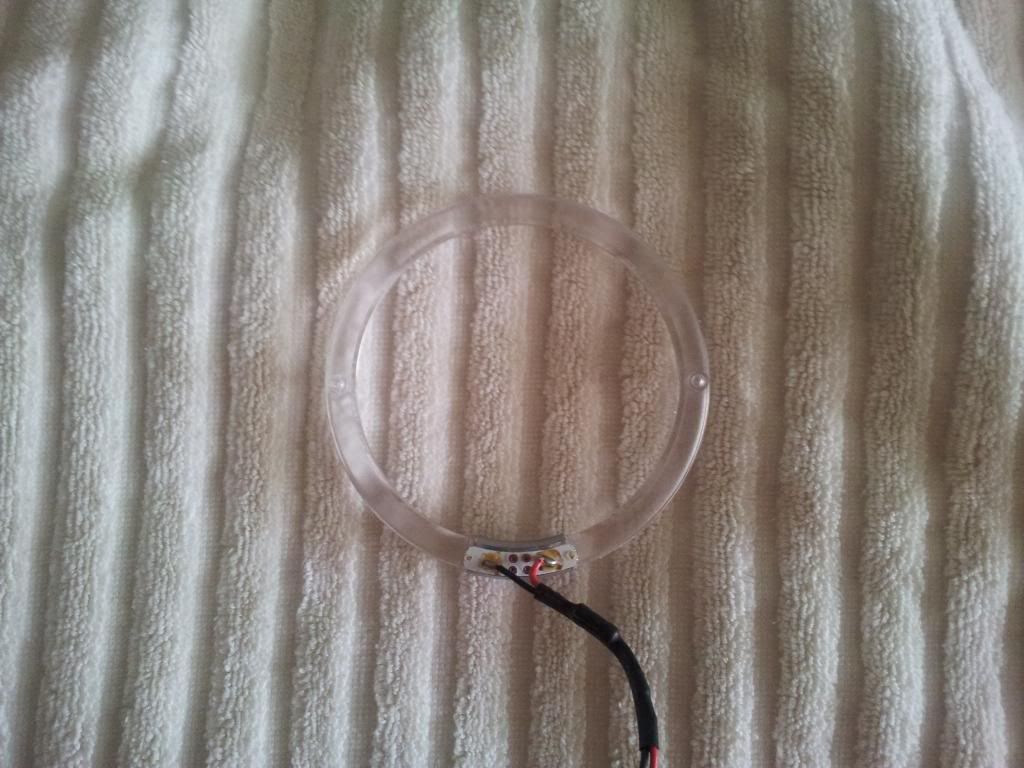
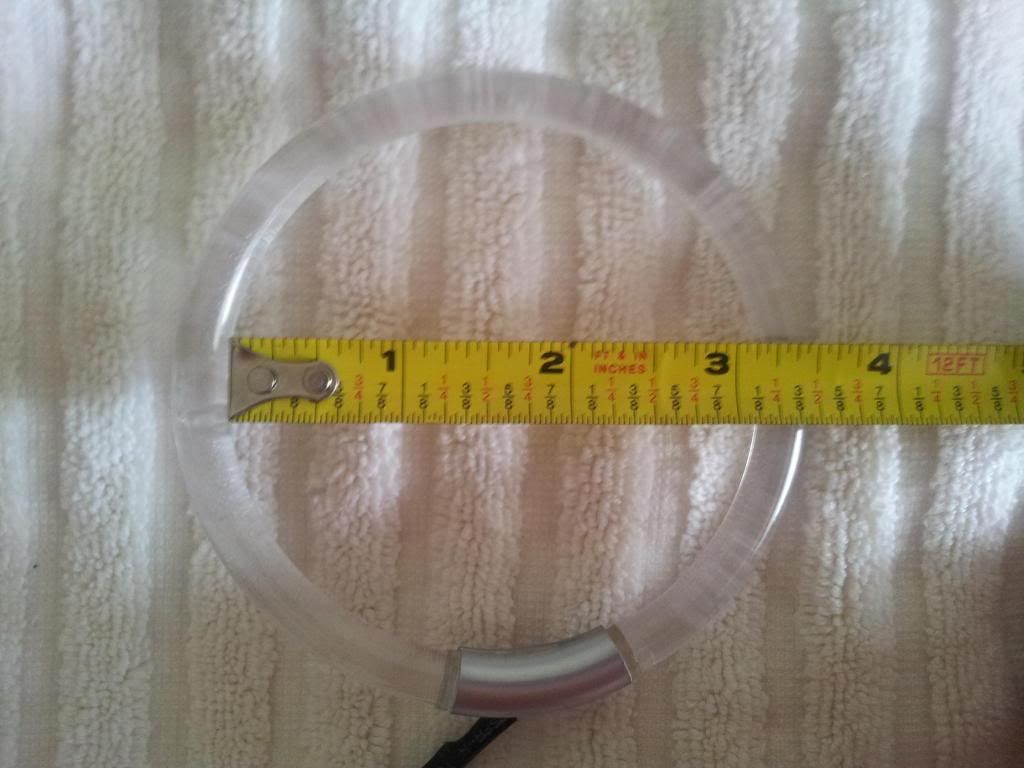
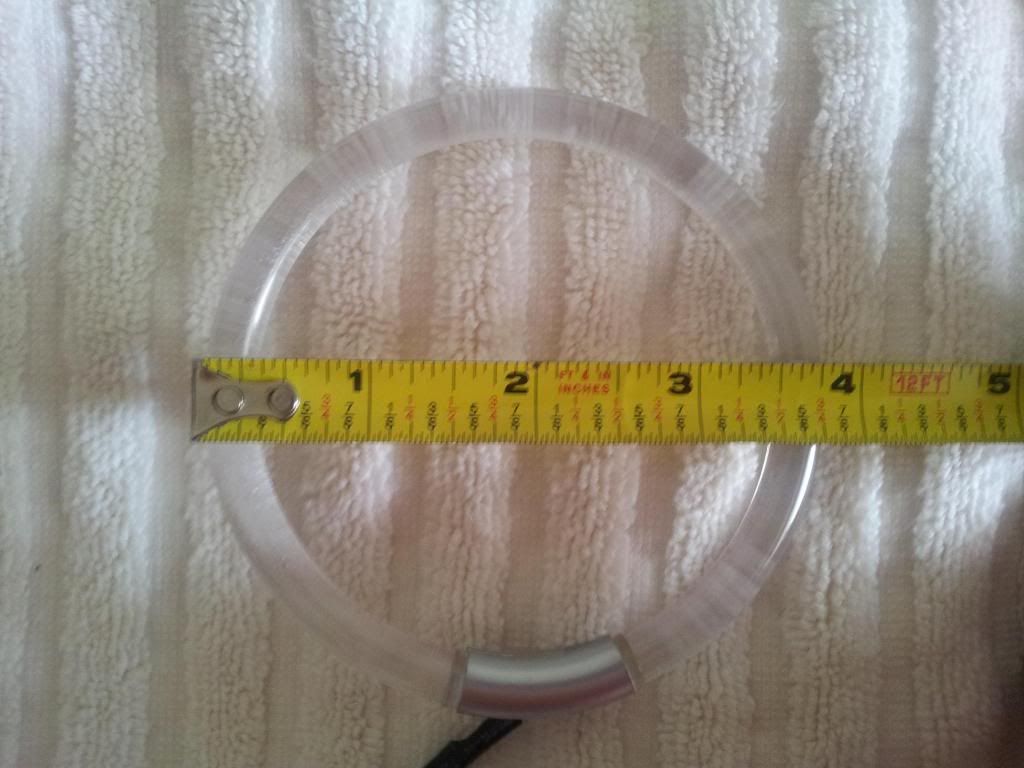
    To take the halo rings out...you will have to take the 2 screws on the back out and its as easy as that...


    If there is someone at a later stage in this retrofit then me...please feel free to post your strategies or thoughts...
    sigpic
    Electrical: * SPYDER Smoke Halo Projector Headlights w/ Morimoto H1 projector retrofit and custome LED Halo rings * HID Conversion Kit 8000K * Alpine Type S SPS-619 and SPS-610C Speakers * MTX Terminator TNP212D2 Dual 12" Subwoofers * Red LED Lighting Front + Dome, Blue LED in Trunk, White LED License Plate * Tinted Tail Lights/LED's Looks: * Carbon Fiber Decals * 15% Tint in the Back and on Top of Windshield, 35% Tint in the Front * Tinted cover on Licence plate * 5mm Wheel Spacers in the Front, 25mm in the Back * Enkei EKM 3 in Hyper Silver 18x8 Performance: * Flowmaster Muffler 80 Series w/ Cherry Bomb Glasspack, 3.5" Double Walled/Slant Exhaust Tips * Michelin Pilot Sport A/S Plus on 225/45/18 * Brembo conversion in the front * BMD SS brake lines * CMS springs * Racingline strut bar

  • #2
    Re: HOW TO - Completely Retrofit your Spyder Housing...

    These are the dimensions for both the halo rings and projectors/xenon's...


    sigpic
    Electrical: * SPYDER Smoke Halo Projector Headlights w/ Morimoto H1 projector retrofit and custome LED Halo rings * HID Conversion Kit 8000K * Alpine Type S SPS-619 and SPS-610C Speakers * MTX Terminator TNP212D2 Dual 12" Subwoofers * Red LED Lighting Front + Dome, Blue LED in Trunk, White LED License Plate * Tinted Tail Lights/LED's Looks: * Carbon Fiber Decals * 15% Tint in the Back and on Top of Windshield, 35% Tint in the Front * Tinted cover on Licence plate * 5mm Wheel Spacers in the Front, 25mm in the Back * Enkei EKM 3 in Hyper Silver 18x8 Performance: * Flowmaster Muffler 80 Series w/ Cherry Bomb Glasspack, 3.5" Double Walled/Slant Exhaust Tips * Michelin Pilot Sport A/S Plus on 225/45/18 * Brembo conversion in the front * BMD SS brake lines * CMS springs * Racingline strut bar

    Comment


    • #3
      Re: HOW TO - Completely Retrofit your Spyder Housing...

      Ok so I was doing some excessive research in my laboratory "bedroom" and I found this...

      What is that think screwed in the middle of my projector? Could that be the indication why the Spyder projectors have such a bad output? Usually projectors don't have anything there, correct me if I'm wrong but take a look see here:

      I got this information from: http://www.crvownersclub.com/forums/...d-traffic.html
      Anywho, I decided take that out and the results may be interesting...this is how it looks:

      And this is how the HID looks inside the housing without that inside the shield...the HID fits perfectly inside now, no touching and I don't need spacers anymore to pull the HID back...


      This is how it looked with it:

      And this is how it looks without it:

      And this is a comparison between the 2:
      sigpic
      Electrical: * SPYDER Smoke Halo Projector Headlights w/ Morimoto H1 projector retrofit and custome LED Halo rings * HID Conversion Kit 8000K * Alpine Type S SPS-619 and SPS-610C Speakers * MTX Terminator TNP212D2 Dual 12" Subwoofers * Red LED Lighting Front + Dome, Blue LED in Trunk, White LED License Plate * Tinted Tail Lights/LED's Looks: * Carbon Fiber Decals * 15% Tint in the Back and on Top of Windshield, 35% Tint in the Front * Tinted cover on Licence plate * 5mm Wheel Spacers in the Front, 25mm in the Back * Enkei EKM 3 in Hyper Silver 18x8 Performance: * Flowmaster Muffler 80 Series w/ Cherry Bomb Glasspack, 3.5" Double Walled/Slant Exhaust Tips * Michelin Pilot Sport A/S Plus on 225/45/18 * Brembo conversion in the front * BMD SS brake lines * CMS springs * Racingline strut bar

      Comment


      • #4
        Re: HOW TO - Completely Retrofit your Spyder Housing...

        Also, I found out that one of my projector lenses are chipped on the side...


        Could this have in impact as well?
        sigpic
        Electrical: * SPYDER Smoke Halo Projector Headlights w/ Morimoto H1 projector retrofit and custome LED Halo rings * HID Conversion Kit 8000K * Alpine Type S SPS-619 and SPS-610C Speakers * MTX Terminator TNP212D2 Dual 12" Subwoofers * Red LED Lighting Front + Dome, Blue LED in Trunk, White LED License Plate * Tinted Tail Lights/LED's Looks: * Carbon Fiber Decals * 15% Tint in the Back and on Top of Windshield, 35% Tint in the Front * Tinted cover on Licence plate * 5mm Wheel Spacers in the Front, 25mm in the Back * Enkei EKM 3 in Hyper Silver 18x8 Performance: * Flowmaster Muffler 80 Series w/ Cherry Bomb Glasspack, 3.5" Double Walled/Slant Exhaust Tips * Michelin Pilot Sport A/S Plus on 225/45/18 * Brembo conversion in the front * BMD SS brake lines * CMS springs * Racingline strut bar

        Comment


        • #5
          Re: HOW TO - Completely Retrofit your Spyder Housing...

          Great work digging into the lights as well as showing..well everything including dimensions. Would be interesting to see what the light pattern is with the solenoid in the high beam position or that shield taken completely out. Hopefully I can get my stockers back in good shape and start tearing mine apart.
          WAMS 91 tune,
          Racingline MMI's
          Chrome Intakes CAI (custom true ram air to come)
          35% side tint, 20% rear, 5% strip
          Debadged except GXP emblems
          Tinted tails
          Spyder tinted lights (complete rebuild + 4 projectors in design stage)
          DDM 5k HID Low's
          Polk 5000.5 amp, 12" Polk DXI sub, Pioneer 4way 6x9's. (complete system replacement soon)

          Comment


          • #6
            Re: HOW TO - Completely Retrofit your Spyder Housing...

            That "thing" sure looks like some kind of heat sink ... I'm guessing the cutoff shields were getting overheated and warping and that was their solution.

            I'd like to know the bolt pattern on those projectors for retrofitting purposes.
            sigpic

            Comment


            • #7
              Re: HOW TO - Completely Retrofit your Spyder Housing...

              Now its time to get some real projectors and Halos in there!

              Comment


              • #8
                Re: HOW TO - Completely Retrofit your Spyder Housing...

                Damn your ahead of me lol. But good stuff! Your getting tsx projectors right?

                Comment


                • #9
                  Re: HOW TO - Completely Retrofit your Spyder Housing...

                  Originally posted by monstORR View Post
                  Damn your ahead of me lol. But good stuff! Your getting tsx projectors right?
                  I am getting projectors that will fit with minimal change required...lol but ya ima start researching it a bit...
                  sigpic
                  Electrical: * SPYDER Smoke Halo Projector Headlights w/ Morimoto H1 projector retrofit and custome LED Halo rings * HID Conversion Kit 8000K * Alpine Type S SPS-619 and SPS-610C Speakers * MTX Terminator TNP212D2 Dual 12" Subwoofers * Red LED Lighting Front + Dome, Blue LED in Trunk, White LED License Plate * Tinted Tail Lights/LED's Looks: * Carbon Fiber Decals * 15% Tint in the Back and on Top of Windshield, 35% Tint in the Front * Tinted cover on Licence plate * 5mm Wheel Spacers in the Front, 25mm in the Back * Enkei EKM 3 in Hyper Silver 18x8 Performance: * Flowmaster Muffler 80 Series w/ Cherry Bomb Glasspack, 3.5" Double Walled/Slant Exhaust Tips * Michelin Pilot Sport A/S Plus on 225/45/18 * Brembo conversion in the front * BMD SS brake lines * CMS springs * Racingline strut bar

                  Comment


                  • #10
                    Re: HOW TO - Completely Retrofit your Spyder Housing...

                    Wow trompii great thread thank you for all the pics and measurements was looking for something like this a while back to replace the halo's and never got a clear answer so this is very much appreciated. Looking forward to your retro fit!

                    Looking at the TSX projectors those may be a little difficult just because they are so much bigger than what's already in there.
                    Last edited by xlemosx; 10-28-2012, 02:44 PM.
                    Appearance: Sexy Electric Blue Metallic - 35% Tint, , Painted Calipers, Spyder Halo Projector Headlights, Red Under Dash LED's, Lower Grill Chrome Trim

                    Performance: Canuck Lowering Springs, Crabs O3 + FPU, Custom Dual Muffler Borla Exhaust, Front Adjustable End Links

                    Audio: Kenwood DNX5120 Double din, Hifonics HFI1000.1 Mono Amp, RE SEX12D4 12" Subwoofer (pushing 750w), Alpine Type S 6x9 Speakers, Jensen Power 720 amp

                    Comment


                    • #11
                      Re: HOW TO - Completely Retrofit your Spyder Housing...

                      what about those Morimoto projectors? small in size but great in lighting. like a best bang for your buck.

                      ______________________The Untouchable!____________________

                      Comment


                      • #12
                        Re: HOW TO - Completely Retrofit your Spyder Housing...

                        How much room is behind the projector in these headlights? The TSX projectors are over an inch longer than the ones you have in the spyders. The room behind has always been the biggest issue with retrofitting projectors for these cars.

                        I agree the Morimoto Minis would be the best, as long as you have room.

                        Comment


                        • #13
                          Re: HOW TO - Completely Retrofit your Spyder Housing...

                          Originally posted by xlemosx View Post
                          Wow trompii great thread thank you for all the pics and measurements was looking for something like this a while back to replace the halo's and never got a clear answer so this is very much appreciated. Looking forward to your retro fit!

                          Looking at the TSX projectors those may be a little difficult just because they are so much bigger than what's already in there.
                          For the halos...the correct size on ours are 97mm... or 3.8189 inches, but most halos on the market are 95mm which is a universal size 2mm should not make too much of a difference, I think. There are some halos from china that I saw with 97mm exact but they only had 2 in stock for the moment...darn. Anyway, glad I could help...
                          LINKS for HALOS:

                          sigpic
                          Electrical: * SPYDER Smoke Halo Projector Headlights w/ Morimoto H1 projector retrofit and custome LED Halo rings * HID Conversion Kit 8000K * Alpine Type S SPS-619 and SPS-610C Speakers * MTX Terminator TNP212D2 Dual 12" Subwoofers * Red LED Lighting Front + Dome, Blue LED in Trunk, White LED License Plate * Tinted Tail Lights/LED's Looks: * Carbon Fiber Decals * 15% Tint in the Back and on Top of Windshield, 35% Tint in the Front * Tinted cover on Licence plate * 5mm Wheel Spacers in the Front, 25mm in the Back * Enkei EKM 3 in Hyper Silver 18x8 Performance: * Flowmaster Muffler 80 Series w/ Cherry Bomb Glasspack, 3.5" Double Walled/Slant Exhaust Tips * Michelin Pilot Sport A/S Plus on 225/45/18 * Brembo conversion in the front * BMD SS brake lines * CMS springs * Racingline strut bar

                          Comment


                          • #14
                            Re: HOW TO - Completely Retrofit your Spyder Housing...

                            LED halos would be better than CCFL

                            Comment


                            • #15
                              Re: HOW TO - Completely Retrofit your Spyder Housing...

                              Because I like u guys, I put one of the projectors back into its housing to take some more measurements...this is what I got so far...


                              And this is what we use (white plastic caps) to rest the projectors on and move them up/down/left/right...


                              The only other this is the screw in the top right corner which is about 27mm from the metal plate...
                              sigpic
                              Electrical: * SPYDER Smoke Halo Projector Headlights w/ Morimoto H1 projector retrofit and custome LED Halo rings * HID Conversion Kit 8000K * Alpine Type S SPS-619 and SPS-610C Speakers * MTX Terminator TNP212D2 Dual 12" Subwoofers * Red LED Lighting Front + Dome, Blue LED in Trunk, White LED License Plate * Tinted Tail Lights/LED's Looks: * Carbon Fiber Decals * 15% Tint in the Back and on Top of Windshield, 35% Tint in the Front * Tinted cover on Licence plate * 5mm Wheel Spacers in the Front, 25mm in the Back * Enkei EKM 3 in Hyper Silver 18x8 Performance: * Flowmaster Muffler 80 Series w/ Cherry Bomb Glasspack, 3.5" Double Walled/Slant Exhaust Tips * Michelin Pilot Sport A/S Plus on 225/45/18 * Brembo conversion in the front * BMD SS brake lines * CMS springs * Racingline strut bar

                              Comment

                              Working...
                              X