

 Tweet
Tweet
I know I've been saying for a long time I'd do a How-To on installing HID's and here it is! It is not too difficult but I have been contacted by many members through IM and PM in the last month or so interested in HID kits and the installation of them so this should help everyone out. Now this is going to be a pretty basic installation for most HID kits out there which are all plug and play. For reliability most sellers will sell you a second wiring harness for each capsule which includes a power, ground, and relay but with most newer cars this is not needed so I'm not including the extra wiring in this How-To.
With all that being said lets get down to business. Most of you interested in HID's have probably ran other lights such as Nokyas or similar bulbs and want something more-meaning you have taken out the headlights to replace your bulbs and that is where you would start here.
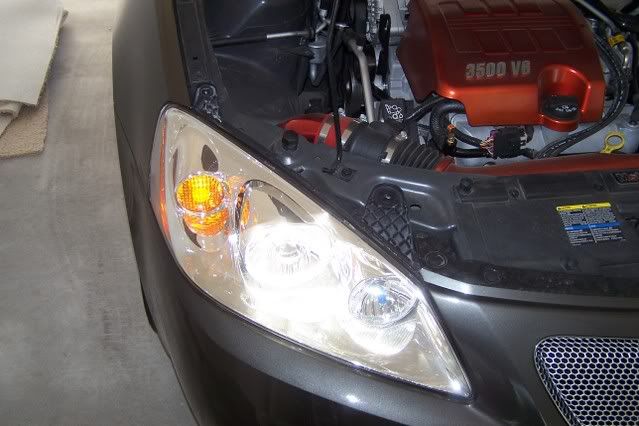
1. This is mostly a pic of just my WideView Prime 8000K HID's on the passenger side to give everyone a reference where I will be working.
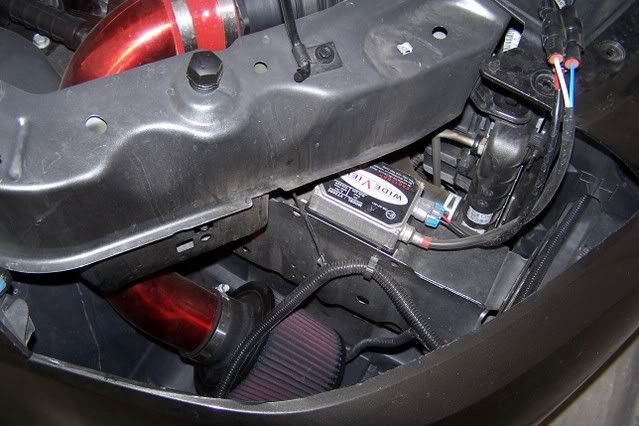
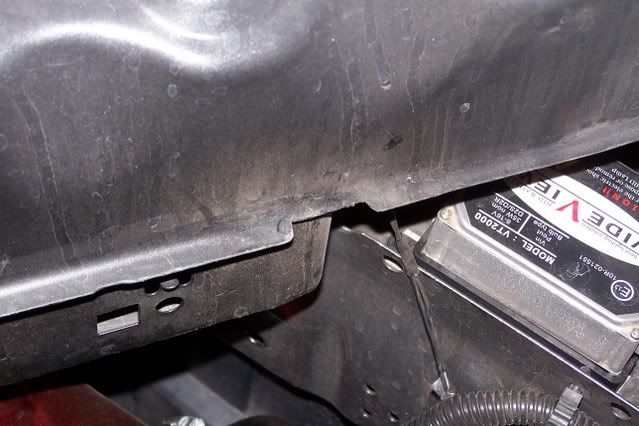
2. Second picture shows an absolutely excellent mounting location for the ballasts on both sides of the car. I've had tremendous difficulty in finding locations to mount the ballasts on other vehicles but the G6 is perfect. Most ballasts come with a sort of tray they sit it but if not just use some double sided adhesive foam and clean off the back of the ballast and the rail of the car and use the adhesive foam to stick the ballasts in place-since there is no force working against them except gravity they will never go anywhere in this spot.
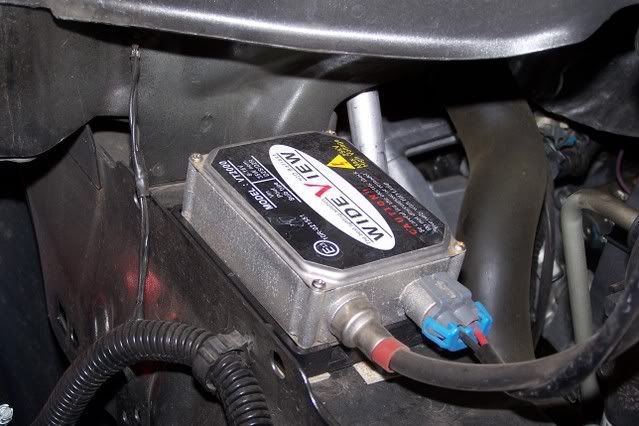
Closer picture of the ballast in the tray-the ballast is stuck to the tray with adhesive foam, then the tray is installed onto the car with adhesive foam also-best mounting method I have seen with this car.
3. Next you need to take the "caps" off the back of the headlights where the lows are-or wheverever you are installing them and use a large drill bit and drill a pretty larg hole in the middle and start working outwards. This hole needs to be large enough to allow the wires from the capsule to run through to the ballast.
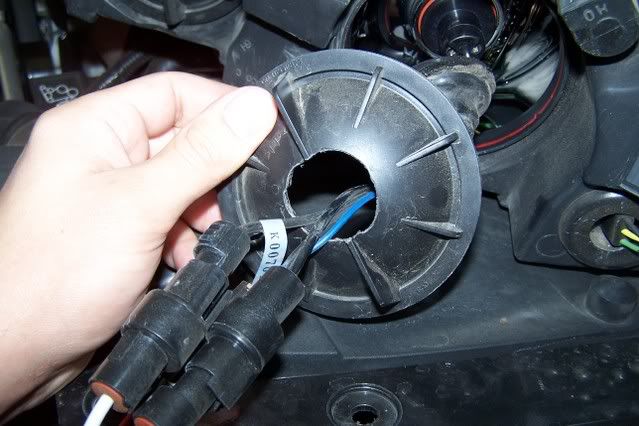
4. Once that is completed connect the signal wires from the factory harness of the car to the harness of the HID's as per the HID manual (I can't tell you exactly because every kit is different). Once that is connected these wires will stay within the light housing and you can re-install the light cover and be sure to pull the grommet through the hole and work the grommet around the hole you cut which shouldn't be too large and not too small-just enough to let the groove in the grommet sit on the plastic to keep dirt out.
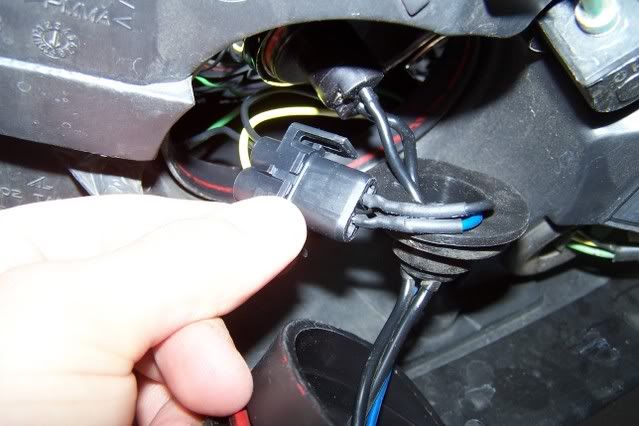
First pic is the harness from the HID kit plugged into the factory car harness.
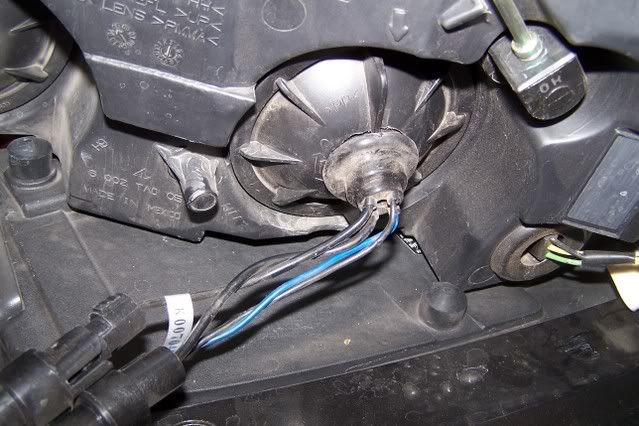
The second pic is the completed wiring from the HID kit and the vehicle harness with the grommet in place within the light cap.
5. No pic here but everything should be installed-the capsule in each headlight housing and each ballast on the frame of the car on each side. Now simply connect the wires from the capsule to the wires on the ballast-they are manufactured so they cannot be connected wrong-just look at the manual for your specific kit and thats it.
6. One last thing is the razor sharp lip that comes off the radiator support. As you can see in this picture on some kits the wires will rub on this lip and can possibly short out-with the amount of power coming from the ballast that would be a really bad thing.
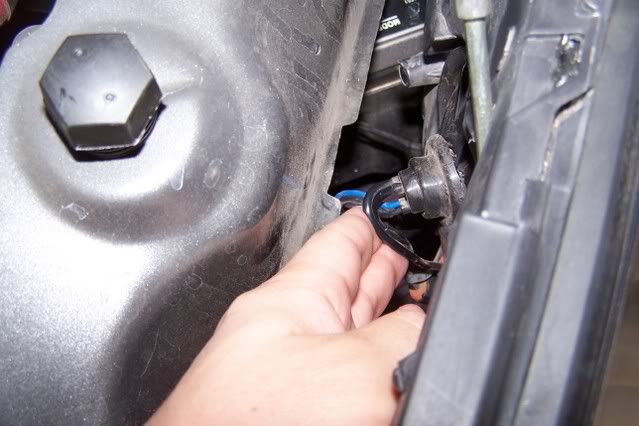
My solution to this was to take a Dremel tool and cut away a clean section on each side to allow for the wires to come out of the light housing and bend down towards each ballast-pretty simple and doesn't look bad at all but be sure to spray the area with primer or clear to protect the bare metal.
That is it for installing HID's! I'm sure most of you will contact me with questions regarding your specific kit which is fine-I enjoy helping anyone out on here. If you have any questions feel free to either catch me through IM, PM, or post a short reply here. Good luck to everyone with their HIDs!!
With all that being said lets get down to business. Most of you interested in HID's have probably ran other lights such as Nokyas or similar bulbs and want something more-meaning you have taken out the headlights to replace your bulbs and that is where you would start here.
1. This is mostly a pic of just my WideView Prime 8000K HID's on the passenger side to give everyone a reference where I will be working.
2. Second picture shows an absolutely excellent mounting location for the ballasts on both sides of the car. I've had tremendous difficulty in finding locations to mount the ballasts on other vehicles but the G6 is perfect. Most ballasts come with a sort of tray they sit it but if not just use some double sided adhesive foam and clean off the back of the ballast and the rail of the car and use the adhesive foam to stick the ballasts in place-since there is no force working against them except gravity they will never go anywhere in this spot.
Closer picture of the ballast in the tray-the ballast is stuck to the tray with adhesive foam, then the tray is installed onto the car with adhesive foam also-best mounting method I have seen with this car.
3. Next you need to take the "caps" off the back of the headlights where the lows are-or wheverever you are installing them and use a large drill bit and drill a pretty larg hole in the middle and start working outwards. This hole needs to be large enough to allow the wires from the capsule to run through to the ballast.
4. Once that is completed connect the signal wires from the factory harness of the car to the harness of the HID's as per the HID manual (I can't tell you exactly because every kit is different). Once that is connected these wires will stay within the light housing and you can re-install the light cover and be sure to pull the grommet through the hole and work the grommet around the hole you cut which shouldn't be too large and not too small-just enough to let the groove in the grommet sit on the plastic to keep dirt out.
First pic is the harness from the HID kit plugged into the factory car harness.
The second pic is the completed wiring from the HID kit and the vehicle harness with the grommet in place within the light cap.
5. No pic here but everything should be installed-the capsule in each headlight housing and each ballast on the frame of the car on each side. Now simply connect the wires from the capsule to the wires on the ballast-they are manufactured so they cannot be connected wrong-just look at the manual for your specific kit and thats it.
6. One last thing is the razor sharp lip that comes off the radiator support. As you can see in this picture on some kits the wires will rub on this lip and can possibly short out-with the amount of power coming from the ballast that would be a really bad thing.
My solution to this was to take a Dremel tool and cut away a clean section on each side to allow for the wires to come out of the light housing and bend down towards each ballast-pretty simple and doesn't look bad at all but be sure to spray the area with primer or clear to protect the bare metal.
That is it for installing HID's! I'm sure most of you will contact me with questions regarding your specific kit which is fine-I enjoy helping anyone out on here. If you have any questions feel free to either catch me through IM, PM, or post a short reply here. Good luck to everyone with their HIDs!!


Comment