
 Tweet
Tweet
Update: June 25th, 2009 - Do not use your stock bolts. Use the $20 refund Steve gave us and buy new 4 new 8 mm x 200 mm hex head bolts for the 4 center bolts for the manifold.
This is really easy. Easier than engine mount inserts. Total time for install was right at 1 hour. The hardest part if making sure you reconnect the 8 or so plugs and hoses back onto the intake manifold. I'm not doing a really detailed write up, because frankly, as long as you know where all the connectors are, it's easy. Just a couple things to note. The bolts Mace sent are too short so use your new purchased 8 x 200 mm bolts (PM me if you can't find any and I'll tell you a place that will ship them). Also, make sure you put silicone on both sides of the insulator.
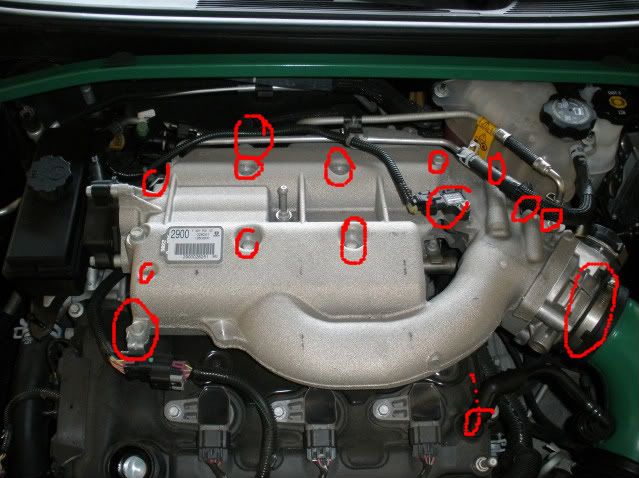
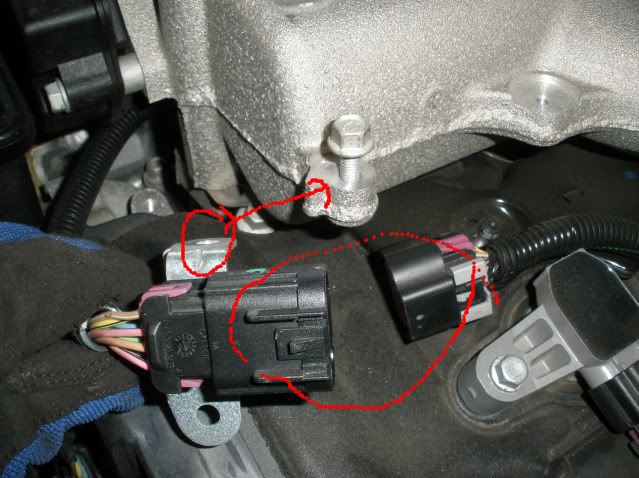
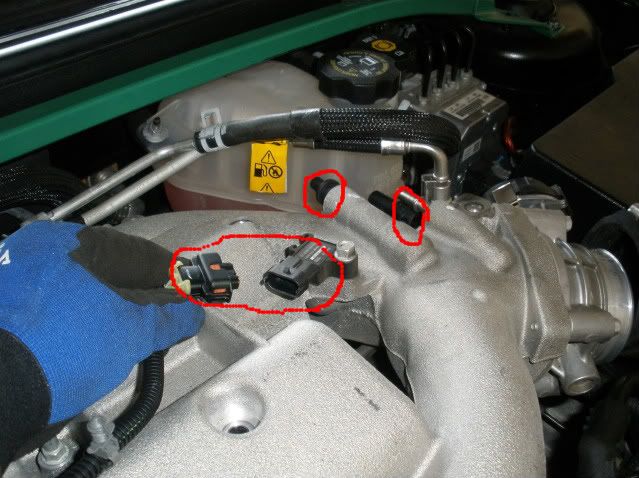
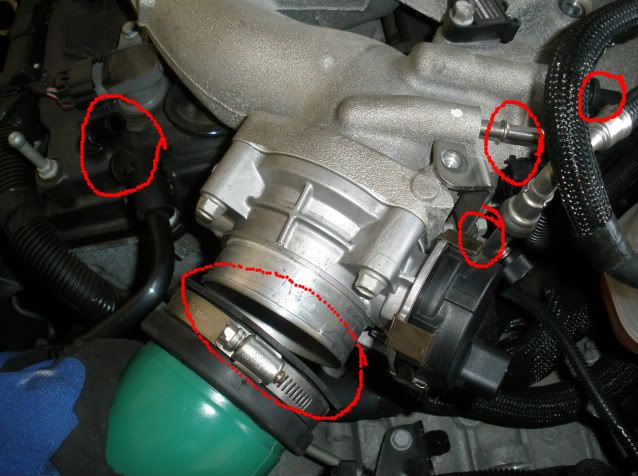
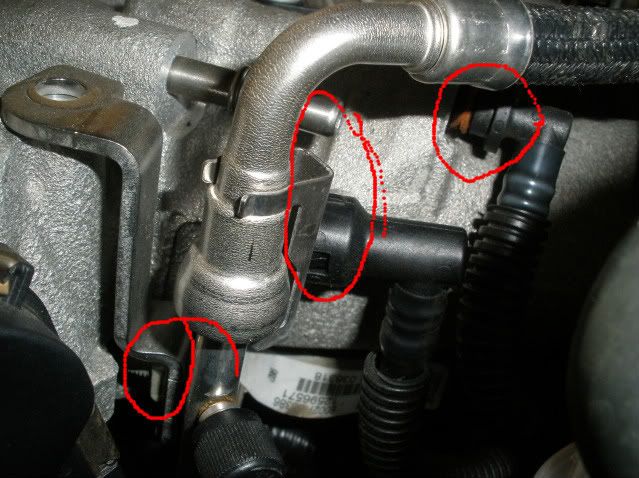
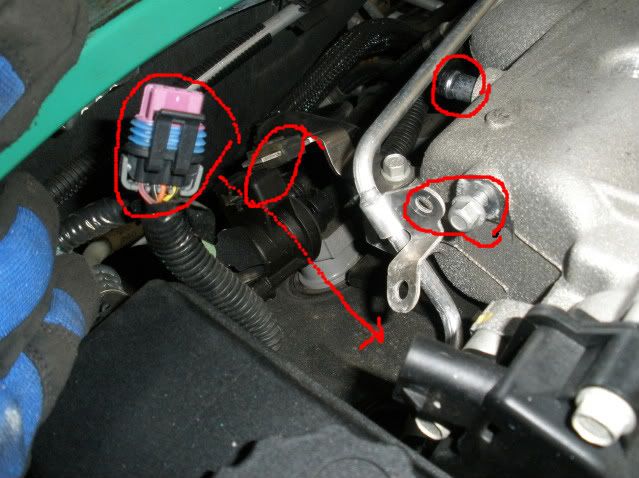
1. Disconnect all the necessary connectors, hoses and nuts and bolts (see pictures where things are circled in red.
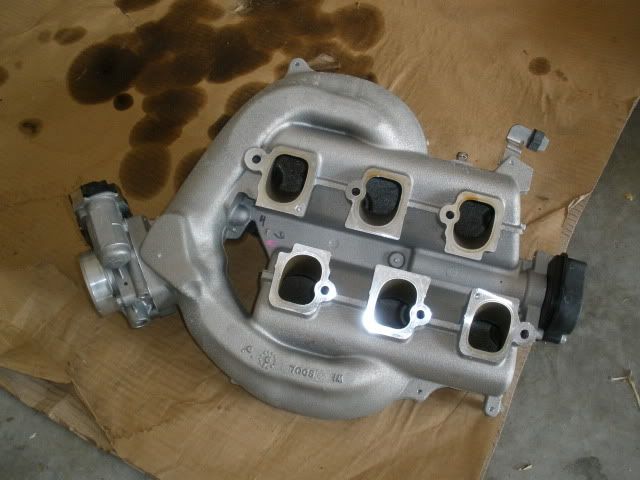
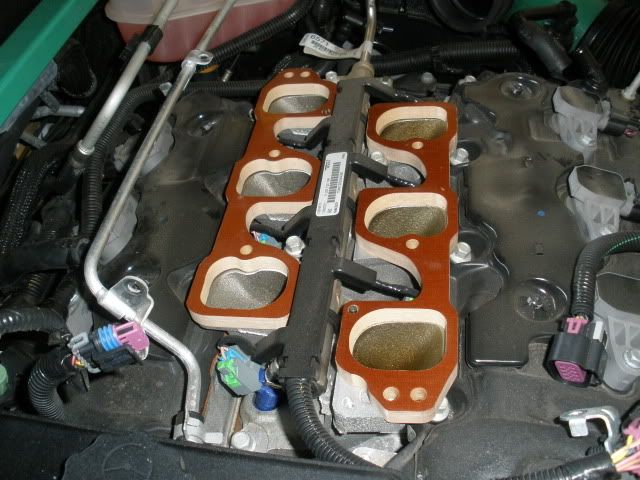
2. Align manifold insulators onto the lower intake manifold to make sure you have them on the right way.
3. Put a fine bead of silicone gasket maker on the underside of the insulators and let dry for like 10 minutes.
4. Put the insulators back onto the lower intake manifold and let dry for 45 minutes.
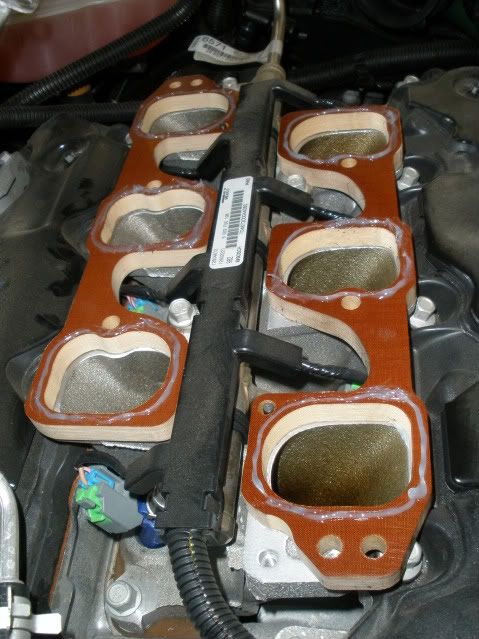
5. Put a fine bead of silicone gasket maker on the topside of the insulator and let dry 15 minutes.
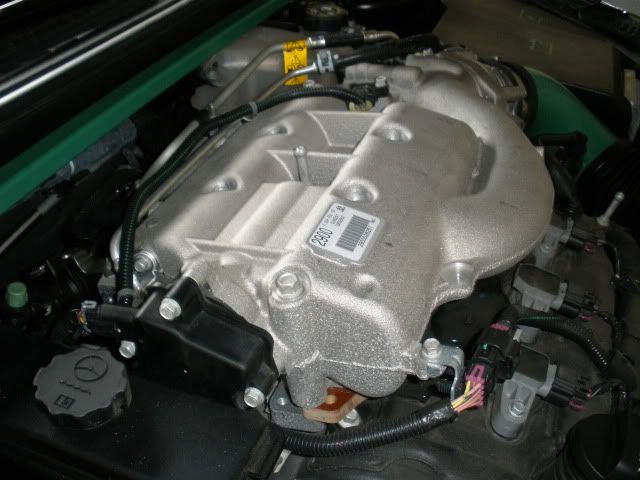
6. Put the upper intake manifold onto the insulators and let sit 45 minutes.
6. Using the newly bought 8mm x 200mm bolts, bolt the manifold into place and torque to 17 lbs.
7. Reconnect all the connectors, hoses, nuts and bolts circled in red.
Now, I noticed that immediately after putting them on, I had REALLY rough idle, like a choke that wasn't pulled out far enough. Running lean almost. After I got moving though, it pretty much went away and until I was coasting. My TSC light came on and the DIC said "Service Traction". I kept driving and it went away later to come back on. It's been doing that (off, on, off, on) and I finally thew a check engine light. I went to Autozone and they confirmed with the codes that I was running lean on both banks 1 and 2. So, I think the added air is making her run lean.
Now, after I've driven about 30 or so miles, the idle has calmed down back to normal. I had Autozone clear my codes, but they came back. I'm going to have them clear the codes again and add some Octane boost to see if that will help at all. One thing to note is that I have a Vector tune, so some of you stock ECM guys may not run into this.
I wonder that the more I drive it, the computer will start to adjust for the lean, much like it adjusts for the JET fake chip. Either way, I'm gonna give Vector a call and see what they say tomorrow.
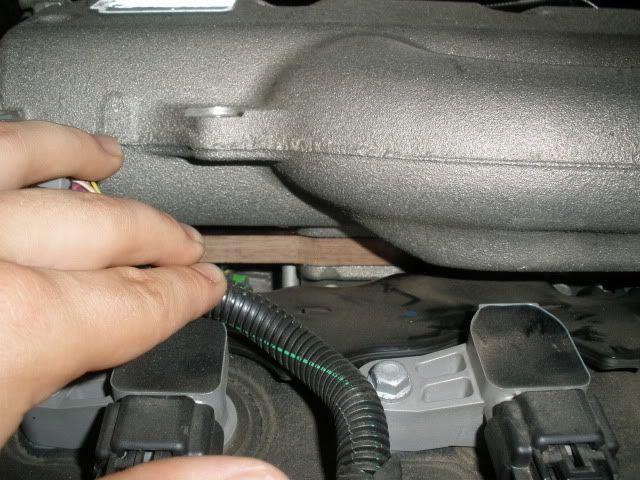
So far, no seat of the pants difference. Not like the GT-R or ECM tune was anyway. I will say though that after running the shit out of her for several highway miles and parking, I was able to put my hand on top of the manifold, so the heat transfer is definitely less. I have noticed no decline in top end performance at all, which is good. I haven't really pushed her too hard though since I still have the check engine codes to fix.
I have email Mace to see if I can get some input from them on this. We'll see what they say. Even with this stuff, I would highly recommend going and ahead and doing the install. It's pretty easy and then we'll know how your cars respond and compare. Now for the pictures.
UPDATE (June 7th): Mace came back and said that it can take up to a couple hundred miles for the engine to adjust to the increased efficiency of the manifold setup. Steve said that the only problems he's run into is folks with tunes may take longer and perhaps need just a tweak to the tune, but nothing major. I'll try to put some miles on her this week and see if things straighten out. I've decided not to use the Octane boost for now, but may try it after putting a couple hundred miles on her if I'm still getting the codes.
UPDATE (June 12th): I re-did the install using more sealant and new 8mm x 200mm bolts. Everything is perfect. Now get to installing!!

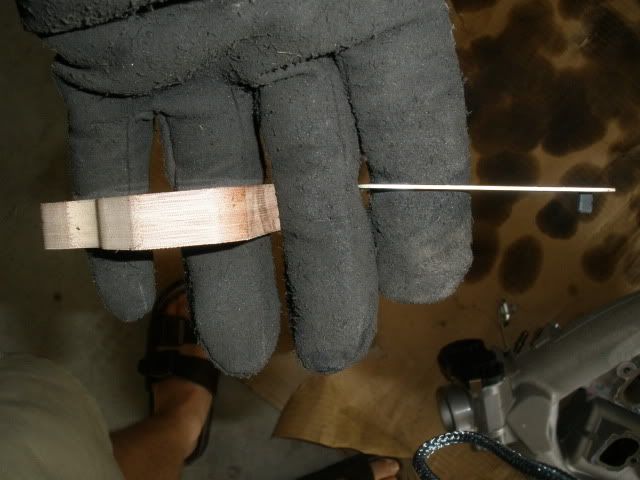
Comparing new insulator vs. stock gasket
After installation
There ya go. Post questions here and I'll answer them for everybody to learn.
This is really easy. Easier than engine mount inserts. Total time for install was right at 1 hour. The hardest part if making sure you reconnect the 8 or so plugs and hoses back onto the intake manifold. I'm not doing a really detailed write up, because frankly, as long as you know where all the connectors are, it's easy. Just a couple things to note. The bolts Mace sent are too short so use your new purchased 8 x 200 mm bolts (PM me if you can't find any and I'll tell you a place that will ship them). Also, make sure you put silicone on both sides of the insulator.
1. Disconnect all the necessary connectors, hoses and nuts and bolts (see pictures where things are circled in red.
2. Align manifold insulators onto the lower intake manifold to make sure you have them on the right way.
3. Put a fine bead of silicone gasket maker on the underside of the insulators and let dry for like 10 minutes.
4. Put the insulators back onto the lower intake manifold and let dry for 45 minutes.
5. Put a fine bead of silicone gasket maker on the topside of the insulator and let dry 15 minutes.
6. Put the upper intake manifold onto the insulators and let sit 45 minutes.
6. Using the newly bought 8mm x 200mm bolts, bolt the manifold into place and torque to 17 lbs.
7. Reconnect all the connectors, hoses, nuts and bolts circled in red.
Now, I noticed that immediately after putting them on, I had REALLY rough idle, like a choke that wasn't pulled out far enough. Running lean almost. After I got moving though, it pretty much went away and until I was coasting. My TSC light came on and the DIC said "Service Traction". I kept driving and it went away later to come back on. It's been doing that (off, on, off, on) and I finally thew a check engine light. I went to Autozone and they confirmed with the codes that I was running lean on both banks 1 and 2. So, I think the added air is making her run lean.
Now, after I've driven about 30 or so miles, the idle has calmed down back to normal. I had Autozone clear my codes, but they came back. I'm going to have them clear the codes again and add some Octane boost to see if that will help at all. One thing to note is that I have a Vector tune, so some of you stock ECM guys may not run into this.
I wonder that the more I drive it, the computer will start to adjust for the lean, much like it adjusts for the JET fake chip. Either way, I'm gonna give Vector a call and see what they say tomorrow.
So far, no seat of the pants difference. Not like the GT-R or ECM tune was anyway. I will say though that after running the shit out of her for several highway miles and parking, I was able to put my hand on top of the manifold, so the heat transfer is definitely less. I have noticed no decline in top end performance at all, which is good. I haven't really pushed her too hard though since I still have the check engine codes to fix.
I have email Mace to see if I can get some input from them on this. We'll see what they say. Even with this stuff, I would highly recommend going and ahead and doing the install. It's pretty easy and then we'll know how your cars respond and compare. Now for the pictures.
UPDATE (June 7th): Mace came back and said that it can take up to a couple hundred miles for the engine to adjust to the increased efficiency of the manifold setup. Steve said that the only problems he's run into is folks with tunes may take longer and perhaps need just a tweak to the tune, but nothing major. I'll try to put some miles on her this week and see if things straighten out. I've decided not to use the Octane boost for now, but may try it after putting a couple hundred miles on her if I'm still getting the codes.
UPDATE (June 12th): I re-did the install using more sealant and new 8mm x 200mm bolts. Everything is perfect. Now get to installing!!
Comparing new insulator vs. stock gasket
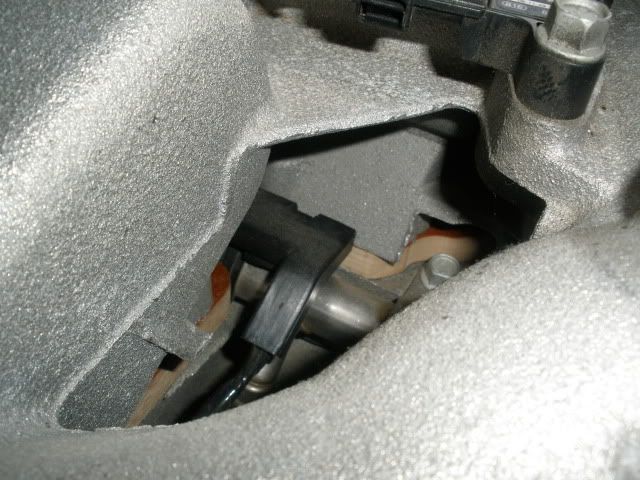
After installation
There ya go. Post questions here and I'll answer them for everybody to learn.


Comment